Sunday, May 6, 2012

Beach Party

The kids' preschool just had its annual Fun Fair and one of the most popular events is the cake walk.


It has become a tradition for each of the classes to make a cake to donate and this year I worked with the youngest class.  The theme of the fair was "beach party" and after a lot of thought I decided to go with a simple beach ball cake.  I wasn't sure if the final result would have any resemblance to a beach ball, but it turned out surprisingly well.


Baking with kids is always an adventure, working with 12 kids who are 3 years old it is an even greater adventure.  I have been doing cakes with the preschool classes for a few years now and have figured a few things out along the way:

  • Less is definitely more:  for the first couple of years I tried to give the kids lots of choices and include them in many of the steps.  This became too overwhelming for everyone. I still want them to be a part of the process, so now I give them 3 colors to choose from and we mix one batch of icing together.  The same with piping tips, I show them 3 different tips and the styles each tip makes.  They then vote on one tip to use.  
  • Have Samples:  the kids are going to stick their fingers in the frosting.  It is much easier to be prepared for this than try and stop it.  By having a bowl of frosting they can stick their little fingers in there is a slightly less chance they will go for the cake - when you see them going for the cake, offer the bowl.  
  • Keep the demo short and give lots of hands on time:  I like to build the cake in front of the kids and have them guess what we are making.  Once the cake is built I take one or two kids at a time to help decorate while the other kids are playing or working on something else.
  •  Have fondant:  Not all of the kids want to try to piping and with the really little ones some aren't strong enough to squeeze the bag, so it is nice to have something they can easily do on their own. 
  • Have fun: sometimes the best cakes are the ones where the kids take over.  Let them squeeze frosting and spread it around, the cake might not be pretty to us, but to the kids it will be the best cake ever.  


Tuesday, May 1, 2012

Cinnamon Swirl Pound Cake

Continuing my current habit of being incrediably late with posts here is the Cake Slice groups April cake.

This month was a wonderfully delicious Cinnamon Swirl Buttermilk pound cake, from The Cake Book by Trish Boyle.  The cake has a subtle orange flavor that mixes wonderfully with the cinnamon streusel that is layered in the cake.  My only problem with this cake is that it was a bundt cake and bundt cakes and I don't get along.  This time I don't know if it was my inability to properly prepare the pan or the cake, as it split right at between the bottom layer and the streusel layer.  I am pretty sure it is me, but it is nice to think maybe the recipe had something to do with it.


Despite the way it looked the cake was still devoured little slice by little slice.  I enjoyed it with some strawberry sauce and Mike liked it with mango strawberry fruit salad. They weren't necessary additions as the cake was super moist and tender, but it was still nice to have a little extra fruit juice flavor.  The Streusel filling was a wonderful addition.  It melted in slightly giving a wonderful extra touch of sweetness. If I make this cake again though, I will add the Streusel in the top 1/4 of the cake rather than in the middle, partly for looks, and also in hopes that the two sections of the cake would adhere together a little better.


Be sure to check out the other cakes from the Cake Slice group and also Tish's blog for lots of sweet treats.

Cinnamon Swirl Buttermilk Pound Cake
from The Cake Book Printer Ready


Cinnamon Streusel Swirl:
1/2 cup all-purpose flour
1/3 cup firmly packed light brown sugar
1/4 teaspoon ground cinnamon
1/8 teaspoon salt
3 Tablespoons unsalted butter, melted

Buttermilk Pound Cake:
2 cups all-purpose flour
1/2 cup cake flour
1 teaspoon baking powder
1/4 teaspoon baking soda
1/2 teaspoon salt
1/4 teaspoon nutmeg
1 cup unsalted butter, softened
2 cups granulated sugar
3 large eggs
2 teaspoons vanilla extract
1 teaspoon finely grated orange zest
1 cup buttermilk

Position a rack in the center of the oven and preheat the oven to 325 degrees F. Grease the inside of a 10-inch Bundt pan. Dust the pan with flour and shake out the excess.

Cinnamon Swirl: In a small bowl, whisk together the flour, brown sugar, cinnamon and salt, breaking up any large lumps of brown sugar. Add the melted butter and stir until blended and crumbly.

Pound Cake: Sift together the flours, baking powder, baking soda, salt, and nutmeg into a medium bowl. Whisk to combine, and set aside.
In the bowl of an electric mixer, using the paddle attachment, beat the butter at a medium speed until very creamy, about 2 minutes. Gradually add the sugar and beat at medium-high speed until well blended and light, about 4 minutes. At medium speed, add the eggs one at a time, beating well after each addition and scraping down the sides of the bowl as necessary. Beat in the vanilla extract and orange zest. At low speed, add the dry ingredients in three additions, alternating with the buttermilk in two additions and mixing just until well combined.
Scrape half of the batter into the prepared pan and smooth it into an even layer. Sprinkle the streusel mixture evenly over the batter. Scrape the remaining batter on top and smooth it into an even layer.
Bake the cake for 65 to 75 minutes, until a cake tester inserted into the center comes out clean. Cool the cake in the pan on a wire rack for 15 minutes.


Invert the cake onto the rack and let cool completely.


Monday, April 30, 2012

Herb Garden

This is a Sponsored post written by me on behalf of Whitney Farms for SocialSpark. All opinions are 100% mine.
 After 4 years on the waiting list we finally got a plot at the community gardens.  While we have space at our house for a garden the soil is awful.  We have tried amending the soil, but the results are never what we hope for.

While waiting for garden space we have done lots of container gardening, which I love.  There is nothing like going outside and picking herbs, a handful of sun warmed cherry tomatoes and few bites of lettuce for a salad on the go.
I can't imagine not having my mini garden, so while Mike is at the garden turning over the beds I am getting our containers ready.  This year I am going to put a little more love into the containers - I don't want them to feel abandoned, and am actually going to feed them.  I am going to give Whitney Farms® 100% organic soil and organic plant food a try this year.  There are no additives, nothing artifical just ingredients from the earth.  And, to make it even better no manure odor,  little to no dust and easy to apply.
109103_1.jpg (6 documents, 6 total pages)
Check out Whitney Farms® for yourself, they are offering a $3 coupon to try out their product.
Whitney-Farms-Logo_Banner_New_C.jpg (6 documents, 6 total pages)
Happy Gardening!
Advertisement


Visit Sponsor's Site

Wednesday, April 18, 2012

Chicken Tacos

Last week was the Secret Recipe Club monthly reveal.  I didn't think I had signed up to participate, and therefore didn't make anything, but it turns out I was signed up.  The result of this mix-up was Ali over at Ali-n-son being orphaned, which I feel awful about.  I had wanted to get something posted last week, but things were crazy last week and the days just disappeared.

So, now over a week late I have finally gotten around to making Ali's Taco Seasoning and crock-pot Chicken Tacos.  Her seasoning mix is wonderful and so much better than anything you could get in a packet.  Making your own mix is super easy, and as Ali points out allows you to adjust heat and flavoring to your family's preference.  My kids aren't super fond of spicy foods, so I toned down the heat on the mix, but you can easily kick it up.

The tacos are also wonderful, and they were inspired from another SRC member.  The adobo provides a slight smoky flavor and the taco seasoning has just the right bite and heat - a perfect combo!   I don't think you can have too many recipes like this.  They are super quick to put together and when you get home a wonderful meal is waiting.  My kids would probably eat these soft tacos every night.


Taco Seasoning
Ali-n-son

Ingredients

4 tablespoons chili powder
1 teaspoon garlic powder
1 teaspoon onion powder
1 teaspoon crushed red pepper flakes
1 teaspoon dried oregano
2 teaspoons paprika
6 teaspoons ground cumin
2 teaspoons fine sea salt
4 teaspoons black pepper

Instructions
Mix together ingredients in an airtight container. Shake to combine.
Add 2-3 tablespoons for every 1 pound of ground beef, turkey or chicken. Use to replace store-bought taco seasoning in any recipe.


Chipolte Chicken Taco
from Ali-n-son

1 (14.5 ounce) can diced tomatoes (regular or fire roasted)

1 tablespoon chopped chipolte pepper (in adobo sauce)
1 teaspoon adobo sauce
1 packet taco seasoning or 2 tablespoons homemade taco seasoning
2 cups low sodium chicken broth
4 boneless skinless chicken breasts

In slow cooker combine all ingredients, except chicken.  Place chicken on top of mixture.  Cook on low for about 5 hours or until chicken is no longer pink inside.  


Let chicken cool slightly, using two forks shred.  Serve with your favorite taco toppings.  


Monday, April 2, 2012

Trifecta Brownies

I saw these brownies on Pinterest a few months ago and have been waiting for the perfect opportunity to make them.  They aren't the type of brownie you make just to have around the house for a little snack.  These are a brownie that need to be shared with a crowd.  I made them for my neighborhood Bunco group, a bunch of ladies I knew would appreciate the sweet, salty, peanut butter deliciousness.

This is one of those recipes that looks really complex and time consuming, but in reality is super easy.  You can make them using a package of peanut butter cookie mix and a box of brownie mix, or you can make them using your favorite recipes.  I used my favorite recipes - a super simple brownie recipe and my favorite 3 ingredient peanut butter cookies.

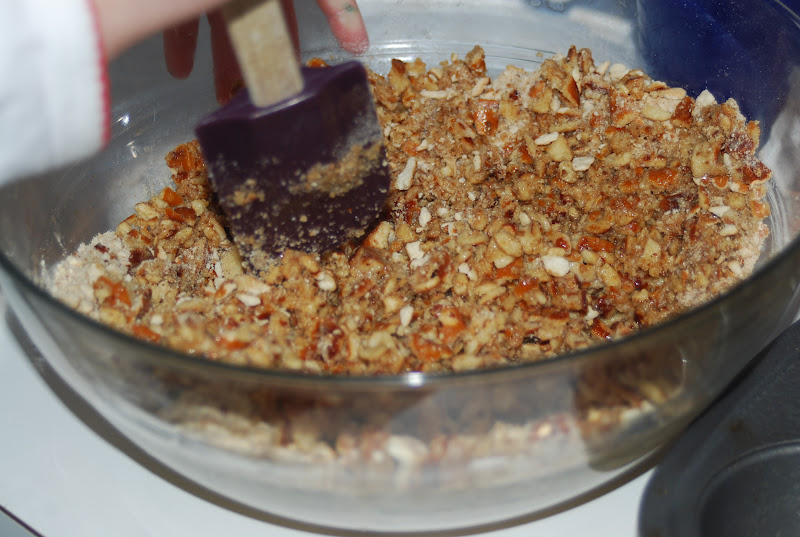
Start by crunching up some salty pretzles, I left some big pieces for a little bit texture. Add a little butter to hold it all together.  Add a tablespoon of this mixture to the bottom of cupcake tins.

Next make your peanut butter cookie dough. Place a flattened ball on top of the pretzel mixture.
Add a miniature Reese's Peanut Butter cup, if you have an assistant watch them very carefully or you may run out of peanut butter cups
Finally top with a couple of tablespoons of brownie batter.  Bake, let cool and enjoy!


Everyday Brownies
Printer Ready


1 1/4 sticks (10 tablespoons) Unslated Butter
1 3/4 cups packed light brown sugar
3/4 cup unsweetened cocoa powder, sifted
1 cup all-purpose flour
1 teaspoon baking soda
Pinch salt
4 eggs
1 teaspoon vanilla extract
About 6 ounces milk chocolate, chopped into small nuggety chunks (or 1 cup chips)
 

Directions
Butter a  13 x 9 x 2 inches
Preheat the oven to 375 degrees F.

In small bowl whisk together the cocoa powder, flour, baking soda and pinch of salt, set aside.

Melt the butter over a gentle heat in a medium-sized saucepan.  Keeping over a low heat add sugar and stir until blended.  Add dry ingredients, stir until combined then remove from heat.

In a small bowl whisk the eggs with the vanilla extract and then mix into the flour mixture.  Stir in the chopped chocolate and quickly pour and scrape into a prepared pan, spreading the mixture with a spatula.  Cook in the preheated oven for about 20 to 25 minutes. It will look set, dark and dry on top, but when you feel the surface, you will sense it is still wibbly underneath.
 

Peanut Butter Cookies
1 cup Peanut Butter
1 cup Sugar
1 Egg


Preheat oven to 350.Combine all ingredients, mix until combined and smooth.  Drop spoonfuls onto baking sheet.  Bake in preheated oven for 6-8 minutes.


Wednesday, March 14, 2012

Gardening

This is a Sponsored post written by me on behalf of Scotts® for SocialSpark. All opinions are 100% mine.

With the weather being so unseasonably warm I have been itching to begin our garden.  It isn't much of a garden and I don't have anything even resembling a green thumb, yet every Spring I like to give it a try.   We have a smell bed that we plant a few tomato, some peas and squash.  Then we have lots of pots filled with herbs and flowers, I have the best luck with these, but it is still nothing to brag about.  

This year though, I have decided to put a little more effort in to the garden.  To begin with I am going to actually provide some nourishment in the soil.  Instead of just using the same dirt that has been in the pots for the past two years I am going to add some new soil.  I had thought I would just get some regular potting soil, but I recently received some information about  Expand ‘n Gro™.  It can be used in the garden or in containers resulting in beautiful luscious plants.  It claims to produce up to 3x the flowers or vegetable of native soil, significantly improves the soil for years, feeds for up to 6 months and holds up to 50% more water than regular soil.   My favorite thing about it is that you can buy just a small bag and and it covers the same amount of space as a large bag of potting soil.  

EnG Product Shot.png

Miracle-Gro has offered to send a free sample to me and to one of my readers.  Leave a comment letting me know what you are planning on planting this year and I will randomly choose one reader to receive a free sample.  I am excited to give Expand 'n Gro a try and hope you check it out as well

Happy gardening!

Advertisement

Visit Sponsor's Site

Monday, March 5, 2012

Yummy Life Meatballs

I love having a batch of meatballs waiting in the freezer.  They are easy to make and are very versatile. I make them often, but I rarely follow a recipe.  I use the same basic seasoning - basil, onion powder, garlic, ect. - each time, but the quantities often vary.  The liquids also vary from batch to batch.  Usually a little milk, sometimes I add some wine, other times a little beer.  One thing I have never added is buttermilk and that is why I chose to make Monica's Classic Italian Meatballs for this month's Secret Recipe Club.

Over at the Yummy Life Monica not only offers a wonderful assortment of recipes, but she also has some great gift ideas and suggestions for around the house.  Her dry rub and taco seasoning look wonderful and might make an appearance under many trees come Christmas.

I really liked the meatballs with the buttermilk.  It enhanced the flavors and kept them super moist - there is nothing worse than a dry meatball.  The other thing I really liked about Monica's recipe that I had never done before is mix everything together prior to adding the meat.  She creates a wonderful "sludge" of the buttermilk, water, eggs and seasoning.  This ensures the flavors are mixed in without overworking the meat.  The only change I made to Monica's recipe was omitting the pork.  Combining beef and pork makes for a much more flavorful meatball, unfortunately my husband is allergic to pork so we all sacrifice with meatballs that are not quite as flavorful as we would like.


We got many meals out of this recipe and still have some left for one more dinner.  We enjoyed meatball subs the first night, a couple of nights later a few made an appearance on a wonderful meatball pizza and a few more popped up in some Ziti.  The rest are waiting in the freezer, and I am sure will be consumed very soon.

Here is Monica's recipe, she has great step-by-step pictures so go check out her site, Yummy Life, as well.

Monica’s Classic Italian Meatballs
Printer Ready

4 eggs, slightly beaten
1/4 cup water
1 cup buttermilk
1-1/2 cup unseasoned bread crumbs
4 teaspoons minced garlic
1 medium onion, finely minced or grated
1 cup fresh Italian parsley, chopped
1 cup grated Parmesan cheese
1 tablespoon dried leaf oregano
2 teaspoons kosher salt
1 tablespoon ground black pepper
4 lbs. ground beef

Directions
Preheat oven to 375 degrees. Combine eggs, water, buttermilk, and breadcrumbs in a bowl; let rest for 10 minutes. The mixture will thicken as the bread crumbs absorb the liquid. To this thickened mixture, add garlic, onion, parsley, cheese, oregano, salt, and pepper; stir until combined. In separate large bowl, combine ground pork and beef. Mix meats with fingers or a large fork using a light touch until 2 meats are combined throughout. Add bread crumb mixture to meats. Mix these together, again using a light touch with fingers or large fork. Combine ingredients well, but do not overmix. Form meatballs with hands, or use a scoop. For larger meatballs, use 1/4 cup meat per meatball or use a generous 2" scoop. For mini meatballs, use 1 to 1-1/2 tablespoons per meatball or a generous 1-1/4" scoop. Place meatballs on baking sheets. Bake large meatballs for 30 minutes and mini meatballs for 15 minutes, until no longer pink in center.


As always there are lots of great recipes in this month's SRC.