Showing posts with label cookies. Show all posts

Tuesday, September 18, 2012

Bacon Day

Tuesdays have recently become "bacon day" in our house. We don't sit around eating bacon all day as tasty at that might be.  What we do do, is bake a special treat.  Tuesdays are our quiet unplanned days, it is also the day that my youngest tells me she never gets to do anything fun and it isn't fair that she doesn't get to go to school everyday like her brother and sister.  To help make her feel better I told her that we would make Tuesdays our special baking day - or "bacon day" if you are 3 and have trouble making "-ing" sounds.

This week we went for a classic, everyone's favorite M&M cookies. 

Like most 3 year old kids scooping and dumping is tons of fun for Edy, so she was in charge of scooping the ingredients into the measuring cups, then pouring into the mixing bowl.  Edy's other main job was the placement of M&Ms.  She alternated between over loading the cookies to only putting one candy on, for fear there wouldn't be enough candies leftover for her to eat when we were done.   


As always, kids learn a ton just being in the kitchen, but if you are looking to get a little extra teaching in while baking, M&Ms are a wonderful teaching tool.  Some fun ways to use them are:
  • Have the kids place the candies in a pattern
  • Ask them to put 3 red, 2 green and 2 yellow then have them tell you how many candies are on the cookie
  • Tell the kids each cookie needs 10 candies and they can only use 3 colors.  How many of each color is used?
 M&M Cookies (Printer Ready)

1 1/2 teaspoons pure vanilla extract
2 cups all purpose flour
1 1/4 teaspoons baking soda
1/4 teaspoon salt
1 cup unsalted butter, room temperature
1/2 cup  granulated white sugar
1/2 cup firmly packed light brown sugar
1 large egg
1 egg yolk
1 cup M&M's

Preheat oven to 350°
In large bowl whisk together flour, baking soda and salt, set aside. In large mixing bowl combine butter and sugar, mix until light and fluffy.  Add eggs and vanilla, beat until just incorporated.  Add flour mixture, again mixing until just incorporated.  

Using a medium sized cookie scoop place balls about 2 inches apart on ungreased parchment lined baking sheet.  Place M&Ms on top of cookie.  Bake for 8-10 or until light golden brown.

*Note M&M’s can be added to the batter after the flour has been mixed in, but I like to put the candies directly on the dough to ensure they stay at the top of the cookie.    


I hope to continue Tuesday Baking Day. It is a nice way to spend some extra special time with my baby Whatever day is your "bacon day" enjoy it with someone special. 


Friday, November 18, 2011

Biscotti

Seven or eight years I ago I was obsessed with Biscotti.  I made tons of it in every imaginable flavor.  I gave it as gifts and ate pounds of it myself.  I loved the stuff, to the point where I became sick of it.  For the first time in about six years I just made it again and I am afraid I may become obsessed again.

It comes together so easily.  There are so many flavor combinations, and even better you can often make two different flavors in one batch.  It is a wonderful snack, morning, noon or night.  It is great with coffee and gets even better when dunked in coffee.  

Oh yummy Biscotti! 


Cranberry Orange Biscotti
Printer Ready

½ cup dried cranberries
½ cup boiling water
3 cups all-purpose flour
2 tsp. baking powder
½ tsp. salt
4 Tbsp. butter, at room temperature
1 cup sugar
4 eggs
2 tsp. Almond extract
Zest from 1 orange
½ cup almonds, chopped
Sprinkling sugar

Directions:
Preheat oven 375.  Line large baking sheet with parchment paper, set aside

In small bowl pour boiling water over cranberries.  Let set for 15 minutes or until plump, then drain water.

Sift flour, baking powder and salt together.  Set aside.

In mixing bowl cream butter and sugar together until light and fluffy,  Add 3 eggs, one at a time, beating each egg until fully incorporated (reserve last egg for egg wash).   Mix in almond extract.  Slowly add sifted dry ingredients.  Mix until just incorporated.  Add cranberries and chopped almonds.  

Turn dough out onto floured surface.  Divide into two equal pieces.  Roll each piece into a log about 16x2.  Place on prepared baking sheet.  Gently flatten logs slightly.   Lightly beat last egg and brush each log.  Sprinkle generously with sugar.  

Bake for 25 minutes or until firm to the touch.  Transfer logs on parchment paper to wire rack.  Allow to cool for 20 minutes.   Reduce oven temperature to 300

On cutting board, using serrated knife, cut logs crosswise on the diagonal into ½ inch thick slices.  Arrange slices on parchment lined baking sheet.  Bake for 15 minutes, flip each piece, bake for an additional 15 minutes.

enjoy!

Sunday, September 4, 2011

Back to School

School starts on Tuesday and we are all set.  School supplies have been purchased and put in the backpack, first day of school outfit has been chosen and most importantly the after school snack is all set.


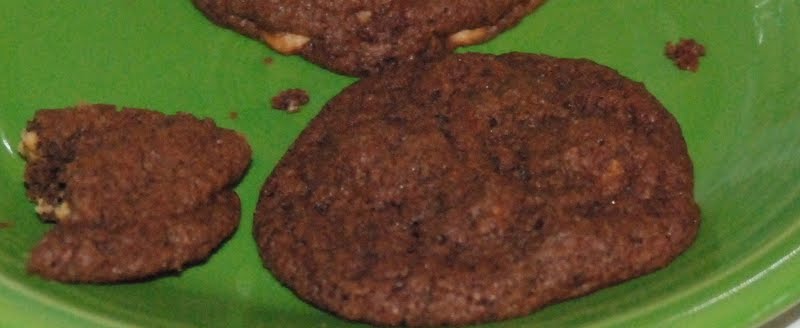
I have been hungry for Chocolate Peanut Butter Chip cookies for about two weeks.  So, while everyone was out of the house I took the opportunity to do some baking all by myself - it has been awhile since I have done any cooking without my helpers and it was a very nice treat.  This is a back of the bag recipe and it is just wonderful.  It is one of my favorite recipes and a cookie I never tire of.  It is a large recipe and I certainly don't need 4 dozen cookies around the house, so I baked off two dozen - sending a dozen down the street to the kids and Dads who were splitting wood  from trees that fell during Irene.  The remaining two dozen I froze.


I love having frozen cookies in the freezer.  There is nothing better than being able to bake off one or two cookies without having to deal with the prep and cleanup.  Having an assortment of flavors is especially nice, just set aside a half dozen or dozen each time you make cookies and everybody can have their favorite, a freshly baked cookie for all!


Chocolate Peanut Butter Chip (Printer Ready ) From Hershey's
2 c. All-purpose Flour
¾ c. Hershey’s Cocoa Powder
1 tsp. Baking Soda
½ tsp. Salt
1 ¼ (2 ½ sticks)  Butter, softened
2 c. Sugar
2 Eggs
2 tsp. Vanilla extract
1 ⅔ c. (10 oz.) Reese’s Peanut Butter Chips

Directions:
Preheat oven to 350.  Line cookie sheets with parchment paper.
Sift together flour, cocoa powder, baking soda and salt.  Set aside
In large mixing bowl cream butter and sugar until pale in color and fluffy.  Add eggs one at a time, mixing until combined.  Add vanilla extract.  Slowly add flour mixture.  When mixture is almost combined add peanut butter chips,  gently mix until chips are evenly distributed.  
Using a cookie scooper, scoop cookies onto tray, spaceing cookies about 1” apart.  Bake 8-10 minutes.  

*If freezing, scoop cookies as directed.  Place onto parchment lined cookie sheet, cookies can be placed closely together.  Place in freezer until frozen then transfer to zip-lock bag.  


Thursday, October 21, 2010

Lollipop Cookies

 
 Aggie had a friend over today and wanted to make cookies.  I had planned on making sugar cookie dough earlier in the day then let the girls cut-out and decorate, but I didn't get a chance to make the dough and give it time to chill.  Martha must have known I needed something - I like to think Martha and I are on the same wave length -  and sent this recipe for Lollipop Cookies, in the daily cookie e-mail, it was the perfect solution.  The girls were able to make the dough, decorate the cookies and enjoy, all in the 3 hour playdate, which meant Aggie's little friend was able to take some of the cookies home.  A win win situation for all. 
The girls had a great time working together and were pretty co-operative.  I had them take turns measuring out the ingredients and tried to break the measurements down as much as possible.  At four they don't understand the math, but telling them we need one cup of flour and have them measure it out using the 1/4 cup measurer gives everybody lots of opportunity to measure while hearing math concepts.  They spent a lot of time playing with the flour, which is a really important part of cooking for kids this age.   Giving kids the opportunity to play with ingredients and explore the texture, smell and overall feel helps gives them a good understanding of the ingredient and eventually how the ingredient changes and can be used.  With my youngest I often give her something like flour, sugar, cornstarch or beans and let her play with the item while I am working with my older two.  It distracts her giving us an opportunity to work, but is also helping her learn about the item.
The only problem the girls had was when it came time to clean, they both wanted to sweep and had a hard time sharing the task.  Definitely not the worst problem to deal with and I hope my girl will always fight for the opportunity to sweep my kitchen floor.  I know I will never stand in her way.