Showing posts with label Secret Recipe Club. Show all posts

Sunday, July 7, 2013

Turkey Potato Galette

I have been participating in Secret Recipe Club since June 2011.  Between the blogs I have been assigned and those I visit on reveal day I have checked out a lot of blogs, yet there are always new ones to discover.  And that was the case with this month's assignment.  I am not sure how I haven't come across Camilla's blog before, but I will definitely be going back there on a regular basis.

Just as the name implies, Culinary Adventures with Camilla is filled with great recipes and great adventures.  Food isn't just enjoyed at home, but experienced in many places and ways.  She talks about picking cherries and olallieberries (a fruit I'm not familiar with) with her kids,  food is incorporated into movies and she has a great collection Cooking Around the World recipes.  But what I love most is that she is passing her love of cooking and food on to her kids.  I love her goal to "grow conscientious, creative kids with fearless palates." and would say it seems she is definitely achieving it.

When it came time to actually making something I had trouble narrowing it down, so I combined a couple of different recipes.  My first choice was the Herb Potato Onion Galette.  It had been a long time since I  made a Galette.  It is one of those foods that I forget about and then become obsessed with,  I love dishes that can be either sweet or savory and can easily substitute or swap ingredients, plus I had a lot of potatoes that needed to be used.  I also wanted to try Camilla's Kale Garlic Turkey Meatballs, again I had some kale that needed to be used up. So, instead of deciding between the two I made both, resulting in a delicious Turkey Potato Galette.


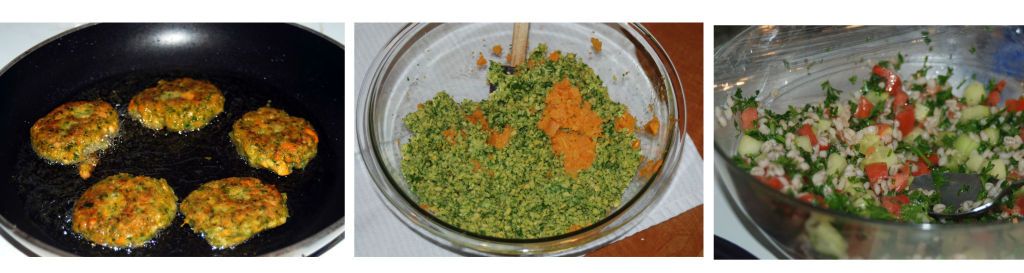
When I made this the first time, I cooked everything separately, but found that to time consuming.  I made a second batch this time cooking the potatoes and onions together and cooking the turkey and kale together.  Not only is this faster, but it also helps bring all the flavors together.


Turkey Potato Galette (Printer Ready)

Ingredients:
5-6 yellow potatoes, thinly sliced
1 large sweet onion, thinly sliced
½ lb. ground Turkey
1 bunch kale, washed and roughly chopped
¼ teaspoon cumin
¼ teaspoon paprika
3-4 cloves roasted garlic
1 disc pate brisse


Directions:
Preheat oven to 375.  Place potatoes and onion in a single layer on large baking sheet.  Drizzle with olive oil and lightly sprinkle with salt and pepper.  Bake for 10-15 minutes or until the potatoes are just tender to the touch.  Remove from oven and set aside.


Place saute pan over medium high heat, add a tablespoon of olive oil.  Once pan and oil are warm add turkey, cumin and paprika.  Cook until turkey becomes light brown, add kale and continue cooking until kale is wilted.  Remove from heat.


On a piece of parchment paper roll brisse dough into a large circle. Move parchment paper and dough onto a baking sheet, it is ok of the dough hangs over the sides of the baking sheet.  Smash roasted garlic into a paste, rub onto dough.  Place turkey, kale, potatoes and onions in center of the dough, leaving about 2 inches of dough to fold over.  Fold dough over leaving some of the filling exposed.  Bake for 30-40 minutes or until lightly golden.


Savory Pate Brisee (Printer Ready)
(modified from a Roland Messier recipe)


Ingredients:
1 teaspoon salt
½ cup water
3 cups all-purpose flour
½ teaspoon garlic powder
2 teaspoon dried basil
1 teaspoon dried parsley
1 cup unsalted butter, chilled and cut into small pieces
1 egg
3 egg yolks


Directions:
In the bowl of an electric mixer combine salt and 1 tablespoon of the water, stir to dissolve the salt.  Add the flour, garlic, basil, parsley and butter.  Using the paddle attachment mix on low speed until the mixture feels like sand.  With the mixer still on low add the egg and yolks one at a time.  Add remaining water, mix until the dough just comes together.  

Turn the dough out onto a lightly floured surface, divide into 2 equal size pieces.  Shape each into a ball and then pat into a disc.  Wrap them tightly in plastic wrap.  Refrigerate for at least one hour before using.  Can be kept in refrigerator for up to 3 days or in freezer, wrapped in plastic wrap and aluminum foil, for up to 2 months.  


Sunday, June 2, 2013

Sun Dried Tomato Pesto

I'm not sure where the past month went.  The end of school craziness have made the days fly by in a blur.  Resulting in complete neglect of many things, including things here at Everyday Mom.  I have a pile of yummy recipes I want to share, but haven't found the time to sit down and get them written up.  I would like to think that I will get caught up once school is out, but based on past experience I am guessing having the three monkeys home all day will make getting caught even more difficult.

One thing I couldn't let slide was this month's Secret Recipe Club reveal.  This month I got to check out Dancing Veggies.  Amanda focuses on cooking healthy vegetarian food on a budget.  Amanda participates in numerous food blog challenges and as a result has a lot of great recipes to choose from.

I had decided at the beginning of the month to make something from Secret Recipe to bring to my book club group.  It is one of those book clubs that is more focused on food and drink than actual book discussion.  I knew this audience would appreciate the idea behind the Secret Recipe Club and the wonderful dishes that come from it.  I had found a lot of great recipes I wanted to try, yet when it came time to actually making something I was short on time.  I needed a dish that would be quick to fix,  serve as a main dish, it had to be served at room temperature and it needed to be portable.  So despite the numerous choices, I went for a classic recipe Sun Dried Tomato Pesto over pasta.


This pesto gives a wonderful burst of flavor and can be served in many ways.  I served it over pasta, but it would be great with chicken, veggies or just smeared on bread.  I altered Amanda's recipe slightly by adding some pine nuts and a fire roasted pepper.  I like the texture the pine nuts provided and the pepper provided a little heat.  Either way you make it, this is a great recipe. It is super easy to make, which is perfect for those nights when time is at a premium.

Sun Dried Tomato Pesto

1 jar Sun Dried tomatoes in oil
1 fire roasted pepper
2 Tbsp. Pine nuts
1/2 cup freshly grated Parmesan cheese
1/2 cup fresh basil leaves (about 6-10 leaves)
3 cloves garlic
Extra Virgin Olive Oil

Place all ingredients in food processor.  Blend until mixture forms a thick paste.  With processor running slowly pour in olive oil until paste thins out to desired consistency.

Sunday, May 5, 2013

Chicken on the Go

It's that time of year where our evening meals are being eaten almost everywhere but home.  We are eating at soccer fields, baseball fields, dance studios and in the car.  If we do happen to eat at home we certainly aren't eating together as a family.  This crazy dining schedule requires meals that are portable and can be eaten hot or cold.  And if they can fix themselves that is even better.

One of my favorite solutions to the dining dilemma is chicken breast in the crock pot.  At the start of the week I throw a pound or two of boneless chicken breasts in with some broth, cook it for a few hours, shred it and have numerous meal options throughout the week.


The repertoire usually includes chicken salad, bbq chicken or thrown in with a tossed salad, but this week thanks to Jenna's Cooking Journey, my Secret Recipe Club match, we had a new chicken dish in the rotation - Chicken Cesar Sliders.  These wonderfully simple and tasty sandwiches were a big hit with all and will definitely stay in the rotation.


Besides these delicious sliders Jenna's blog is filled with many wonderful recipes.  She participates in a lot of different blog challenges - my favorite is the "Whats Baking Challenge" I am looking for an excuse to bake her latest recipe for cream cheese delights.  

Crockpot Chicken Caesar Sliders

2 lbs. boneless chicken breast
2 cups chicken broth
1 tablespoon minced garlic
1 tablespoon onion powder
Salt and pepper 
1/2 to 1 cup Caesar salad dressing
1/2 cup Parmesan cheese
Romaine lettuce, tomatoes, rolls

Place chicken in a 3-4 quart slow cooker.  Add broth garlic, onion powder and salt and pepper.  Cook on low for 4-6 hours.  Using a slotted spoon remove cooked chicken, allow to cool slightly.  Remove any fat from chicken and broth. Using two forks shred chicken.  Place shredded chicken back in slow cooker, add Caesar dressing and Parmesan cheese, stir until coated.  Cook for an additional 15-30 minutes.

Serve on toasted rolls with lettuce, tomatoes and additional Parmesan cheese if desired. 


Monday, April 8, 2013

Almond Chicken Tenders

Like many families chicken tenders are a favorite in our house.  You can dress them up, chop them up or eat them plain.  They make an easy snack lunch or dinner and are always a hit with the kids.

Every few weeks I try to make a large batch to keep in the freezer.  I am not very consistent about making them and having them available, but when I do it is always a wonderful treat to open the freezer and find them there.  Especially when I haven't thought about dinner, it's 6:30 and everybody is starving and grumpy.  

I usually use the same basic recipe for the coating - bread crumbs and a mix of Italian seasoning.  Tasty, but nothing fancy and to be honest I get a little tired of having the same old things in the freezer all the time.   When those ho hums set in I often look for some inspiration to change things up and for me inspiration for change often comes from the Secret Recipe Club.  This month my inspiration came from Melissa at a Fit and Spicy Life.  Her blog is filled with a wonderful assortment of recipes, fitness tips and wine - the perfect trifecta.

Melissa's recipe for Almond Chicken Fingers is a delicious change from our typical tenders and will definitely be a regular item in the freezer.   They are moist, flavorful and work in a variety of dishes - they were delicious in an Asian chicken salad and just as tasty with a little honey mustard dipping sauce


 I made one change to Melissa's recipe, only because of what was available in my pantry.  I didn't have enough whole almonds, so I roughly chopped what I had and then used some almond meal flour to finish the coating mixture. The chopped almonds provided a wonderful texture while the almond meal gave the tenders a nice thick coating.

The other change I made was in process, I like using coating trays - mainly because my kids love to help, getting thick messy fingers is very entertaining for them - but you can also use the dip and shake method as Melissa does, it's all preference.  


Almond Chicken Tenders

2 lbs chicken breasts, cut into tenders
1 cup unsweetened almond milk
2 eggs
1 Tbsp Dijon mustard
1/4 cup almonds, finely chopped
1 1/2 cups almond meal flour
Salt and Pepper

Preheat oven to 400.  Lightly oil (or spray) a cooking sheet.
In a small bowl beat eggs, almond milk and mustard together, set aside.  In a large bowl combine chopped almonds, almond meal, salt and pepper.  Dip a chicken tender first into egg/milk mixture then into the dry mixture.  Place coated tender on baking sheet, repeat with remain tender.  Place tenders in a single layer with space between each piece. 
Bake 20-25 minutes, depending on thickness of chicken.  Using tongs flip chicken pieces half way through baking time.

And if you are in need of a little change and inspiration check out the rest of the SRC

Monday, February 4, 2013

Baked Oatmeal

It's time for another Secret Recipe Club reveal, which means I was introduced to another wonderful blog filled with mouthwatering recipes.

This month I was partnered with Tessa over at the Cookin' Chemist.  She has a lot of recipes on her site which made the selection difficult.  The recipe index is nicely organized and made the selection process a little easier.  I decided to go with something for breakfast, but even after narrowing it down to breakfast items I still had over 30 different recipes to choose from.

The final decision was based on the fact that I had one, and only one, ripe banana on my counter.  When I came across her recipe for Baked Oatmeal To Go I knew I had found the recipe.


This is a super easy recipe that can be made up quickly the night before or even in the morning.  Tess uses a food processor to blend the liquid ingredients, but I made it in just one bowl which speeds up the clean-up process and still results in a great final product.  I didn't make this batch with the kids, but suspect it would be a great recipe to get them involved with.  If you don't use the food process there is a lot of hands on activity that would be very enjoyable and easy for them to do.  Plus they can add their favorite mix-ins - I did pecans in mine, Tess used blueberries in her recipe, but any nut or berry, fresh, frozen or dried, would be great -  which would allow more hands-on involvement 


The muffins are very filling  and provide a great source of energy to start the day.  There is a nice hint of sweetness, but nothing over the top.  Perfect for grabbing on your way out the door for work or school.  I highly recommend making a batch for yourself and while your waiting for them to come out of the oven go check out some more of Tess's recipes.

Baked Oatmeal (from the Cookin' Chemist)

1 over ripe banana
1 cup applesauce
1 egg
1 1/4 cups Almond milk (any type of milk will work)
2 Tbsp. honey
1 tsp. vanilla
2 1/2 cups old fashioned oats
2 Tbsp. ground flax seed
2 tsp. cinnamon
1/2 tsp. nutmeg
1 1/2 tsp. baking powder
1/4 tsp. salt
1/2 cup pecans roughly chopped (or your favorite mix-in blueberries, dried fruit)
2 Tbsp. maple sugar (optional)

Preheat oven to 350.  Line 12 muffin cups with paper liners.

In large mixing bowl mash banana  until smooth. Add applesauce, egg, milk, honey and vanilla stir until combined.  Add oats, flax seed, cinnamon, nutmeg, baking powder salts and pecans, mix until combined.
Using a large scoop fill muffin cups, muffins will not rise while baking so fill the cups to the top or desired size. Sprinkle tops of muffins with maple sugar.  Place in oven, bake for 25-30 minutes.

Tuesday, January 8, 2013

SRC - Granola

This month I got to do two Secret Recipe Club assignments.  Jess, at the Inquiring Chef, was left orphaned and I was lucky enough to be able to get her blog and do a second reveal.  Jess's blog is beautiful.  It is not only filled with wonderful recipes, but also gives a peak into her life as she and her husband reside temporarily in Bangkok.

There were many recipes that were very tempting.  Working my way through the Inquiring Chefs 2012 favorites would be a tasty adventure.  Due to time constraints and pantry limitations I decided on Jess's Cranberry Pecan Granola.


We have been out of granola for about a week and I had been meaning to make it this week, so this was the push I needed to get it done.  I usually stick to the same basic recipe, but Jess's recipe and the use of powdered milk was very intriguing. I have never seen a granola recipe that uses powdered milk and had no idea how it would taste or what it would do.  

Jess jokes about entertaining the idea of using coffee creamer when she was unable to find powdered milk.  She, or actually her husband, eventually found some powdered milk and didn't have to resort to using coffee creamer.  I on the other hand did use the creamer.  I had a napping child, no interest in running to the store and a large container of coffee creamer that I have no idea how I am ever going to use up.


I made about a 1/4 of the recipe, I didn't want to make a full batch and discover that coffee creamer and granola is a disgusting combination.  In the end I was pretty satisfied with the results.  I am still not exactly sure what impact the creamer or powdered milk has.  It was slightly richer than my usual granola, but overall there wasn't a great difference in taste.

I am still curious about the powdered milk and will probably pick some up the next time I go to the store to do some experimenting.  Let me know if you have any suggestions or know what the powdered milk does, I would love to learn more.


Inquiring Chef Cranberry Pecan Granola

4 cups rolled oats
2 cups pecans, roughly chopped
1 cup oat bran
1 cup powdered milk
2 tsp. salt
3/4 cup vegetable oil
3/4 cup honey
1 Tbsp. vanilla extract
1/2 tsp almond extract
1 cup dried cranberries

Preheat oven 350
In large bowl  mix together oats, pecans and oat bran.  In small bowl combine powdered milk, salt, vegetable oil, honey, vanilla extract and almond extract.  Pour wet mixture over dry ingredients, stir until well combined.  Spread mixture over two baking sheets.  Bake, stirring halfway through, until light golden brown and fragrant, about 15-20 minutes. Remove from oven, mix in cranberries.  Let cool completely.  Store in airtight container.


Monday, November 5, 2012

Lasagna Soup

It's the beginning of the month which means it's Secret Recipe Club time.  Before I reveal my recipe I have a confession - I didn't make anything this month, my husband did, but I did not.  The day before the reveal and as always I had marked a bunch of different recipes, but hadn't made anything.  To make things more challenging I had to work, so I brought in some backup.


I was a little worried about bringing in Mike as a replacement.  He is an excellent cook, but he has trouble following a recipe, so even though I gave him a recipe for Lasagna Soup there was a great possibility I could have come home and found something completely different.  In the spirit of SRC he did follow the recipe, but made a few changes and we now have two delicious recipes to turn to when a craving for lasagna soup strikes.

As a thank you to Mike for helping out I have a favor to ask of you.  Mike loves knowing what other people eat and he started a Facebook page called "so what did you eat".  He just started it and would love to build it up so if you could "like" the page and share what you eat Mike, and I, would really appreciate it.  It doesn't matter if you had a gourmet meal or a bag of chips and a soda, just snap a picture and share away.

As I said this month's SRC dish was lasagna soup from Cravings of a Lunatic.  There are so many great recipes to choose from, I was initially going to make the Turtle Popcorn, but with all the Halloween candy around I couldn't add another sweet to the house.  Even though it didn't make an appearance this month I am sure it will around Christmas time.

Here is Kim's recipe.  This is a delicious, quick and easy dish.  Perfect for cold days when you need some warm comfort food.  Enjoy!


Ingredients
  • 1 pound ground beef
  • 1 onion, chopped
  • 1 green pepper, chopped
  • 3 cloves garlic, minced (I didn’t have fresh so I used minced garlic)
  • 1 tablespoon brown sugar
  • 1 box (32 oz) of beef broth, or mix 4 cups boiling water with 1 to 2 tablespoons of better than bouillon beef base (I used the better than bouillon)
  • 1 (28 fl oz) can of whole peeled tomatoes (san Marzano), pulsed in blender
  • 1 (1 lb 8 oz) jar of pasta sauce ( I used Ragu Sauteed Onion & Garlic)
  • 1 teaspoon dried basil
  • 1 teaspoon dried oregano
  • ½ teaspoon salt
  • 2 cups broken lasagna noodles
  • 1 (5 oz) package of grated parmesan cheese
  • 2 cups mozzarella (the new pizza mozzarella is the bomb)
Instructions

  1. Brown your ground beef, onion, and pepper in a large dutch oven. It should be broken into fine particles and cooked till juices run clear.
  2. In the last minute or two add the garlic.
  3. Now add your brown sugar, tomatoes, sauce, oregano, basil and salt. Bring to a boil. Reduce heat and simmer for about 20 minutes.
  4. Add the noodles and simmer until they are tender. Stir in parmesan.
  5. Turn on your broiler.
  6. Transfer soup into ovenproof soup bowls. Place in oven and broil for 3 to 5 minutes.

Monday, October 8, 2012

SRC: Sweet Potato Falafel

I have to admit that when I got my Secret Recipe Club assignment this month I didn't spend a lot of time searching Isabelle's site - Crumb - before making a decision.  I saw the recipe for Sweet Potato Falafel Wraps and I knew immediately what I was making.  I have since spent more time checking out her site and have marked many recipes to try.


The Sweet Potato Falafel recipe looks a little intimidating at first read.  The sandwich is made up of 4 different components and while none of them are difficult to make it can be a little overwhelming at first read.

Having four separate recipes actually worked to my benefit. It was one of those days that was broken into weird chunks. I wasn't home at any one time to get everything done, but was home for enough time here and there to get parts of it done.  And, the flavors actually improve with a little bit of rest time, so if you need a make ahead recipe this is the perfect fit.

My entire family loved this dish, my son even asked if I could make it again the following week.  It is a super bright and flavorful dish, that is great anytime of year.  The creamy hummus is a perfect match with the crunch of the falafel and tabooli salad and the yogurt in the tahini sauce provides a nice tang.
falafel

With the exception of the Tahini sauce I followed Isabelle's recipe exactly. Isabelle's recipe called for half a cup of Tahini and half a cup of yogurt.  I had a a thicker Greek yogurt and the ratios of the sauce seemed a little thick, so I only used 2 tablespoons of Tahini and half a cup of yogurt.  I liked the tang the Greek yogurt provided and felt there was still plenty of the slight nutty flavor provided by the Tahini.


Homemade Falafel Wraps
Author: Isabelle Boucher (Crumb)

Printer Ready
Ingredients

Tahini Sauce:
½ cup plain yogurt
2 Tbs. tahini
2 tbsp fresh lemon juice
1 clove garlic, minced
Pinch salt

Homemade Lemony Hummus:
1 can (19 ounce) chickpeas
3 tbsp lemon juice
2 tbsp tahini
2 cloves garlic, chopped
½ tsp paprika
½ tsp salt

Tabbouleh Salad:
1 cup roughly chopped parsley
½ cup roughly chopped fresh mint leaves
½ cup cooked bulghur wheat
1 cup diced tomato
1 cup diced cucumber
3 tbsp lemon juice
2 tbsp olive oil
Salt and pepper

Falafel Patties:
¼ cup chopped cilantro
¼ cup chopped parsley
2 cloves garlic, minced
1 can (540 ml/19 oz) chickpeas, rinsed and thoroughly drained
1 cup cooked mashed sweet potato
¼ cup flour
1 tsp ground cumin
1⁄2 tsp chili flakes
¼ tsp salt
2 tbsp canola oil

Wraps:
4 Middle Eastern style pitas
Shredded lettuce
Thinly sliced red onion
Instructions
Prepare the Tahini Sauce (up to 5 days in advance):

  1. In a small bowl, stir together all of the ingredients until smooth. Cover and set aside until ready to use.

Prepare the Hummus (up to 5 days in advance):

  1. Drain the chickpeas, reserving the canning liquid. Rinse thoroughly.
  2. In the bowl of a food processor, combine chickpeas, lemon juice, tahini, garlic, paprika and salt. Process until smooth and creamy, adding as much of the reserved canning liquid as needed to get a spreadable consistency. Cover and set aside until ready to use.

Prepare the Tabbouleh (up to 2 days in advance):

  1. Using a food processor pulse the parsley and mint until finely chopped.
  2. Transfer the chopped parsley and mint to a mixing bowl, and toss with the remaining tabbouleh ingredients until combined. Season to taste with salt and pepper, then cover and chill until ready to use.

Make the Falafel Patties:

  1. In the bowl of a food processor, process the cilantro, parsley and garlic until very finely minced. Add chickpeas, and pulse until finely chopped, but not completely pureed. Transfer to a mixing bowl, and stir in sweet potato, flour, cumin, chili flakes and salt to make a dense batter that holds its shape when rolled into a ball – if it’s too wet, add more flour, 1 tbsp at a time, until it reaches the appropriate consistency.
  2. Scoop out a dozen golfball-sized portions, and shape into a rounded patties.
  3. In a large skillet set over medium-high heat, pan-fry the patties in oil for 3-5 minutes per side, or until golden and crisp (the patties are fairly fragile, so be gentle when flipping!). Transfer to a baking sheet lined with paper towel to drain.

Assemble the Wraps:

  1. To assemble the wraps, carefully pull apart each pita, stopping about halfway around to form a pocket with two flaps.
  2. Spread with a generous amount of tahini sauce and hummus, then fill the pocket with a handful of tabbouleh, toppings of your choice and 3 falafel patties.
  3. To close up the wraps, lay a pita down on a plate with the open end facing away from you. Gently tuck the top flap over the filling and back into the sandwich, and continue the rolling motion to create a tight wrap. (If this sounds overly complicated, you can also cut the pitas in half cross-wise, then gently separate each half to make two individual pockets.) Serve immediately.


Be sure to check out more of Isabelle's great recipes over at Crumb

Monday, July 9, 2012

Texas Caviar

I am not sure when I will learn that procastination is not a good thing.  Every month I get my SRC assignment choose 2 or 3 recipes that look really good and am determined to make them right away.  Yet every month it seems as if I am scrambling to make something a few days before the posting deadline.

This month I knew I had to make something early in the month because of travel plans.  I gave myself a deadline of June 28th, but did I have anything made by then - no.  I was still ok though, I had a few days before we left on vacation and I had all the ingredients to make one of Noelle's Green Monster Smoothies, in Popsicle form.  I knew we had some super hot days coming up and couldn't wait to have a Cherry Bom Bom waiting in the freezer.

Then the power went out for two days, making our refrigerator look like this.


One good thing about an outage is that your fridge gets a really good cleaning.

 I knew the produce wouldn't last while we were gone so I passed it on to neighbors and decided to get back to An Opera Singer in the Kitchen when I returned from vacation.  I knew there were a lot of great recipes I could choose from and would definitely be able to find something to make, even if I only had a day to do it.

Since our weather was still unbearably hot I decided to go for something light and easy - Texas Caviar Salad.


This was the perfect dish for a hot summer night.  We made a meal out of it by serving it with some tortilla chips and avocado slices, but it also makes a great side dish.  I made it early in the morning, allowing all the flavors to meld together. I didn't need to turn the stove on during the heat of the day and we came home to a delicious and belly filling meal after an afternoon at the pool.  

I modified Noelle's recipe slightly - using canned beans instead of dry and reducing proportions.  Be sure to go visit An Opera Singer in the Kitchen. she has a lot of great vegan recipes on her site, so be sure to go check them out.


Texas Caviar


1 can black eyed-peas, drained and rinsed
1 can black beans, drained and rinsed
1 cup corn (canned, frozen or fresh)
2 cups tomatoes, diced
1 cup cilantro, finely diced
1/2 cup red onion, finely diced
1/2 cup Italian dressing

Combine all ingredients, mix well.  Cover and refrigerate for at least one hour.
Enjoy!


Monday, June 4, 2012

Peach Clafoutis

This month's Secret Recipe Club assignment was a real challenge for me.  Alessio at Recipe Taster: Savor the Unexpected has an amazing collection of recipes.  Alessio is an Italian living in Germany, he is a physicist, an artist and a chef.  This wonderful mix is reflected in his food and the beautiful pictures on his blog.

The wonderful assortment of recipes led to a great deal of deliberation, which lead to procrastination.  Which resulted in me still not having made anything the day before the reveal.  One of my top choices all along had been Swiss Chard and Almond Gundi.  I struggle with how to use greens and am always looking for new recipes.  Unfortunately when it came time to make something I didn't have any Swiss Chard on hand.  Luckily I am getting some in this week's vegetable delivery so I will still be able to give it a try.

I finally decided to make the Peach and Apricot Clafoutis, but I had to make one change.  The recipe called for  "Quark" which, before a little research was not something I was familiar with. After a little research I discovered Quark is a fresh cheese similar to curd or cottage cheese, it is available in the US as farmer's cheese.  Since I procrastinated I didn't have time to go to the cheese store, or any store for that matter, so I substituted the Quark with Greek yogurt. I also decided to use milk instead of water to get a little more fat into  it.  

I served it with a blueberry lavender sauce and it paired up beautifully in looks and taste.


This is another great dessert to have in your collection.  The peaches can be substituted with cherries, berries apples, or what ever you have on hand and is in  season.  You can make it quickly, it looks impressive and the final results will impress your most finicky guest.

Peach Clafoutis


2 eggs
1/4 cup Greek yogurt
1/4 cup Milk
1/2 cup flour
1/4 cup sugar
2 peaches

Preheat oven to 350.  Lightly butter a small baking dish.
In large bowl lightly whip eggs.  Stir in yogurt and milk.  Add flour and sugar mix until just combined.  Pour into prepared baking dish.
Bake for 20-25 minutes or until lightly golden and slightly firm to the touch.
Serve warm

*if you happen to have some leftovers this makes a wonderful breakfast treat.  In a frying pan melt a tablespoon of butter, add a slice cook on each side until golden brown.  Serve with the sauce or fresh berries.


Monday, May 7, 2012

Happy Biscuits

Mike and I spend a lot of time talking about rolls and biscuits.  I realize it is an odd topic to spend a lot of time discussing.  We have this conversation most often around the holidays, but are happy to discuss the pros and cons of each any time of the year.  The conversation is a result of the fact  that I come from a biscuit family while Mike comes from a roll family.

When we first started spending holidays with each others extended families I was saddened to learn that only rolls would be served with Thanksgiving dinner, no biscuits and gravy.  How could this be called a proper meal!  Mike was fascinated by the way my Mom and Aunt would throw together a perfect batch of biscuits in  just minutes without even measuring.  He took on the mission of learning how to make light and fluffy biscuits.  There were a few disasters along the way, but now when we are having Thanksgiving with his family he always makes sure I have my biscuits.


As we grew our own family we willingly excepted both rolls and biscuits, although if forced to choose I would take a biscuit.  Sweet or savory they are just heavenly and that is why I knew I had to try Crystal's Cheddar Garlic Buttermilk Biscuits for this month's Secret Recipe Club.


Crystal has a wonderful blog - Mrs. Happy Homemaker - filled with delicious recipes, household tips and homeschooling ideas, she is definitely one busy woman.

Crystal's biscuits are a family recipe.  Her mom recommends using White Lily Flour and even though I am not a southerner and sometimes have a hard time finding this brand, I agree this is the best brand for light and flaky biscuits.  The Cheddar Garlic biscuits are just an enhanced version of the plain buttermilk biscuit, so if you aren't a fan of cheddar or garlic just omit those ingredients and still have an amazing biscuit, the perfect side for any meal.


Cheddar Garlic Buttermilk Biscuits
Recipe from Mrs. Happy Homemaker  (Printer Ready)

Cheddar Garlic Buttermilk Biscuits
from Mrs. Happy Homemaker

Ingredients:
2 cups self rising flour
1/4 cup vegetable shortening (like Crisco)
3/4 cup whole buttermilk
1.5 cups cheddar cheese
1 teaspoon garlic salt
1 tablespoon garlic powder + 1 tsp garlic powder
1 stick unsalted butter

Instructions:

Preheat your oven to 500 degrees.

Using your fingers, work the shortening in with the flour in a large bowl until the flour appears crumbly, about the size of little peas. Stir in the buttermilk & shredded cheddar with a wooden spoon.

Lightly dust your countertop with a little flour.

Pat the dough down into a neat rectangle, no reason to do any kneading really. Using a pizza cutter, slice the biscuits into 8-10 squares.  Place the biscuits into a greased cast iron pan or if you don't have one, a round cake pan or any casserole dish will do, with the sides of the biscuits just touching.

Melt 4 tablespoons of the butter and stir in the tablespoon of garlic powder and garlic salt. Pour on top of the biscuits.Bake for 15 minutes, or until nicely browned.

Melt the rest of the butter.  Add the teaspoon of garlic powder and stir.  Brush the mixture on top of the biscuits once they come out of the oven.


Wednesday, April 18, 2012

Chicken Tacos

Last week was the Secret Recipe Club monthly reveal.  I didn't think I had signed up to participate, and therefore didn't make anything, but it turns out I was signed up.  The result of this mix-up was Ali over at Ali-n-son being orphaned, which I feel awful about.  I had wanted to get something posted last week, but things were crazy last week and the days just disappeared.

So, now over a week late I have finally gotten around to making Ali's Taco Seasoning and crock-pot Chicken Tacos.  Her seasoning mix is wonderful and so much better than anything you could get in a packet.  Making your own mix is super easy, and as Ali points out allows you to adjust heat and flavoring to your family's preference.  My kids aren't super fond of spicy foods, so I toned down the heat on the mix, but you can easily kick it up.

The tacos are also wonderful, and they were inspired from another SRC member.  The adobo provides a slight smoky flavor and the taco seasoning has just the right bite and heat - a perfect combo!   I don't think you can have too many recipes like this.  They are super quick to put together and when you get home a wonderful meal is waiting.  My kids would probably eat these soft tacos every night.


Taco Seasoning
Ali-n-son

Ingredients

4 tablespoons chili powder
1 teaspoon garlic powder
1 teaspoon onion powder
1 teaspoon crushed red pepper flakes
1 teaspoon dried oregano
2 teaspoons paprika
6 teaspoons ground cumin
2 teaspoons fine sea salt
4 teaspoons black pepper

Instructions
Mix together ingredients in an airtight container. Shake to combine.
Add 2-3 tablespoons for every 1 pound of ground beef, turkey or chicken. Use to replace store-bought taco seasoning in any recipe.


Chipolte Chicken Taco
from Ali-n-son

1 (14.5 ounce) can diced tomatoes (regular or fire roasted)

1 tablespoon chopped chipolte pepper (in adobo sauce)
1 teaspoon adobo sauce
1 packet taco seasoning or 2 tablespoons homemade taco seasoning
2 cups low sodium chicken broth
4 boneless skinless chicken breasts

In slow cooker combine all ingredients, except chicken.  Place chicken on top of mixture.  Cook on low for about 5 hours or until chicken is no longer pink inside.  


Let chicken cool slightly, using two forks shred.  Serve with your favorite taco toppings.