Thursday, June 6, 2013

The Pink Cake

The winning cake for this month's Cake Slice Baker's is Julie Richards Pink Cake.  How can you not want to make something called "The Pink Cake."  For me it brings up contrasting images sometimes I think of ladies in the 60's wearing flowery dresses and enjoying this cake at a ladies luncheon with a glass of spiked punch.  Then other times I think of a little girls birthday party with this light pink cake as the center piece - although there is a pretty good chance the mom's might be enjoying some spiked punch at this event as regardless of the decade.

I served my pink cake as part of a teacher appreciation lunch, where no spiked punch was served, although the teachers might have wanted some.  While I was very happy to contribute this cake I was a little bummed that I didn't get to try a slice.  I was hoping some would be left when I went in for clean-up, but no such luck.  I guess it's a good sign when a cake quickly disappears, but I wasn't happy having only cake scraps with a little bit of the icing.

From what I did have it was a rich moist cake with great chocolate flavor.  The icing was buttery and sweet with a nice hint of raspberry.  A perfect combination and a cake I will make again, but when I know I will be able to have a slice.

I have chosen not to include the recipes from Vintage Cakes, other members of the Cake Slice Bakers have modified and provided the recipe, so be sure to check out the rest of the group.

Sunday, June 2, 2013

Sun Dried Tomato Pesto

I'm not sure where the past month went.  The end of school craziness have made the days fly by in a blur.  Resulting in complete neglect of many things, including things here at Everyday Mom.  I have a pile of yummy recipes I want to share, but haven't found the time to sit down and get them written up.  I would like to think that I will get caught up once school is out, but based on past experience I am guessing having the three monkeys home all day will make getting caught even more difficult.

One thing I couldn't let slide was this month's Secret Recipe Club reveal.  This month I got to check out Dancing Veggies.  Amanda focuses on cooking healthy vegetarian food on a budget.  Amanda participates in numerous food blog challenges and as a result has a lot of great recipes to choose from.

I had decided at the beginning of the month to make something from Secret Recipe to bring to my book club group.  It is one of those book clubs that is more focused on food and drink than actual book discussion.  I knew this audience would appreciate the idea behind the Secret Recipe Club and the wonderful dishes that come from it.  I had found a lot of great recipes I wanted to try, yet when it came time to actually making something I was short on time.  I needed a dish that would be quick to fix,  serve as a main dish, it had to be served at room temperature and it needed to be portable.  So despite the numerous choices, I went for a classic recipe Sun Dried Tomato Pesto over pasta.


This pesto gives a wonderful burst of flavor and can be served in many ways.  I served it over pasta, but it would be great with chicken, veggies or just smeared on bread.  I altered Amanda's recipe slightly by adding some pine nuts and a fire roasted pepper.  I like the texture the pine nuts provided and the pepper provided a little heat.  Either way you make it, this is a great recipe. It is super easy to make, which is perfect for those nights when time is at a premium.

Sun Dried Tomato Pesto

1 jar Sun Dried tomatoes in oil
1 fire roasted pepper
2 Tbsp. Pine nuts
1/2 cup freshly grated Parmesan cheese
1/2 cup fresh basil leaves (about 6-10 leaves)
3 cloves garlic
Extra Virgin Olive Oil

Place all ingredients in food processor.  Blend until mixture forms a thick paste.  With processor running slowly pour in olive oil until paste thins out to desired consistency.

Sunday, May 5, 2013

Chicken on the Go

It's that time of year where our evening meals are being eaten almost everywhere but home.  We are eating at soccer fields, baseball fields, dance studios and in the car.  If we do happen to eat at home we certainly aren't eating together as a family.  This crazy dining schedule requires meals that are portable and can be eaten hot or cold.  And if they can fix themselves that is even better.

One of my favorite solutions to the dining dilemma is chicken breast in the crock pot.  At the start of the week I throw a pound or two of boneless chicken breasts in with some broth, cook it for a few hours, shred it and have numerous meal options throughout the week.


The repertoire usually includes chicken salad, bbq chicken or thrown in with a tossed salad, but this week thanks to Jenna's Cooking Journey, my Secret Recipe Club match, we had a new chicken dish in the rotation - Chicken Cesar Sliders.  These wonderfully simple and tasty sandwiches were a big hit with all and will definitely stay in the rotation.


Besides these delicious sliders Jenna's blog is filled with many wonderful recipes.  She participates in a lot of different blog challenges - my favorite is the "Whats Baking Challenge" I am looking for an excuse to bake her latest recipe for cream cheese delights.  

Crockpot Chicken Caesar Sliders

2 lbs. boneless chicken breast
2 cups chicken broth
1 tablespoon minced garlic
1 tablespoon onion powder
Salt and pepper 
1/2 to 1 cup Caesar salad dressing
1/2 cup Parmesan cheese
Romaine lettuce, tomatoes, rolls

Place chicken in a 3-4 quart slow cooker.  Add broth garlic, onion powder and salt and pepper.  Cook on low for 4-6 hours.  Using a slotted spoon remove cooked chicken, allow to cool slightly.  Remove any fat from chicken and broth. Using two forks shred chicken.  Place shredded chicken back in slow cooker, add Caesar dressing and Parmesan cheese, stir until coated.  Cook for an additional 15-30 minutes.

Serve on toasted rolls with lettuce, tomatoes and additional Parmesan cheese if desired. 


Sunday, April 28, 2013

Mini Fruit Tarts

One of my favorite cooking activities with kids are mini fruit tarts.  They are a perfect project for kids of all ages.  Kids get an opportunity to practice cutting, mixing and presentation. They are a great way to introduce new fruits  and best of all they can be eaten right after making them, no waiting necessary.


When choosing the fruit I keep in mind, who I am working with and what fruit is in season.  When working with the 4 year old kids in my daughter's preschool class I wanted them to work on cutting, so I chose fruit that would be easy for them to cut - strawberries, bananas, mango and kiwi were the answer.  I prepped the fruit before hand and cut everything into big pieces, with a flat size that would be easy for the kids to work with.

The filling and crust are just as versatile as the fruit.  This time I use leftover sugar cookie dough for the crust, but you can also use a pie dough, graham cracker crumbs or any sweet dough.  For the filling I used cream cheese lemon curd, but again this could be substituted   Any jam can be used in place of the lemon curd and a straight up pudding filling is always a favorite.


This is the perfect treat that gives kids the opportunity to create their own unique dessert that is a sweet treat for all!


Mini Fruit Tarts

    • 1 recipe sweet dough (sugar cookie or pie dough)
    • 8 oz cream cheese, at room temperature
    • 1/4 cup lemon curd (or any jam) - amount can be adjusted if you want more or less flavor
    • Assortment of fruit, cut into small bite sized pieces.
  • Instructions

    1. Preheat oven to 350
    2. Roll dough to 1/4" thick. Cut into rounds slightly larger than the cups of a mini muffin tin. Press a round of dough into each cup. Bake for 8-10 minutes or until lightly golden. Let cool.
    3. In a mixing bowl combine cream cheese and lemon curd. Stir until combined. Place mixture in a pastry bag.
    4. Fill each cup with lemon curd mixture, top with an assortment of fruit.

Thursday, April 18, 2013

Sweet Potato Burgers

Sweet potatoes have become a new family favorite.  I never really gave them much thought, for me they were a food served either mashed at holidays or mashed to babies, but not an everyday kind of food.


A few years ago I discovered they were super yummy baked up as fries, but again only an occassional food.

Then a few months ago I made Sweet Potato Falafel as a Secret Recipe Club dish. We became hooked and sweet potatoes are now a regular in the rotation. The Falafel is definitely our favorite, but these burgers are a close second.  They are really just a variation of my Sweet Potato Quesadilla, but it's the Chipotle Avacado Sauce that put these burgers over the top.


Sweet Potato Burgers (Ziplist)

  • ServesCook TimeTotal TimePrep TimePublisher
    610 minutes1 hour50 minuteseverydaymom
  • Ingredients 

    • 3 cups cooked sweet potatoes, mashed
    • 1-2 cloves roasted garlic (having a head of roasted garlic in the fridge is always wonderful)
    • 1 cup black beans, rinsed and drained
    • 1/2 cup panko bread crumbs
    • 1/4 cup all purpose flour
    • 1 egg, lightly beaten
    • 2 teaspoons smoked paprika
    • 2 teaspoons onion powder
    • 1 teaspoon cumin
    • Salt and Pepper to taste
  • Instructions 

    1. In a large bowl combine sweet potatoes, garlic and beans roughly mash together. Add remaining ingredients stirring until just combined. Refrigerate mixture for 15-20 minutes.
    2. Preheat frying pan over medium heat, add 2-3 tablespoons olive oil and heat. Evenly divide mixture into 6 loosely packed burgers. Place in hot pan and cook 6-8 minutes on each side. The mixture is wet so be sure to allow each side to cook until brown before flipping.
    3. Serve on toasted roll with chipotle avocado sauce, lettuce and additional avocado slices.

Chipotel Avocado Sauce (ziplist)

  • Ingredients 

    • 1 large avocado
    • 1/2 cup Greek yogurt
    • 2 Tablespoons Adobo chipotle sauce
  • Instructions 

    1. In medium bowl mash avocado. It doesn't need to be completely smooth some lumps are fine and make for a wonderful texture. Add yogurt and chipotle sauce. Stir until well combined. Add salt and pepper to taste

Monday, April 8, 2013

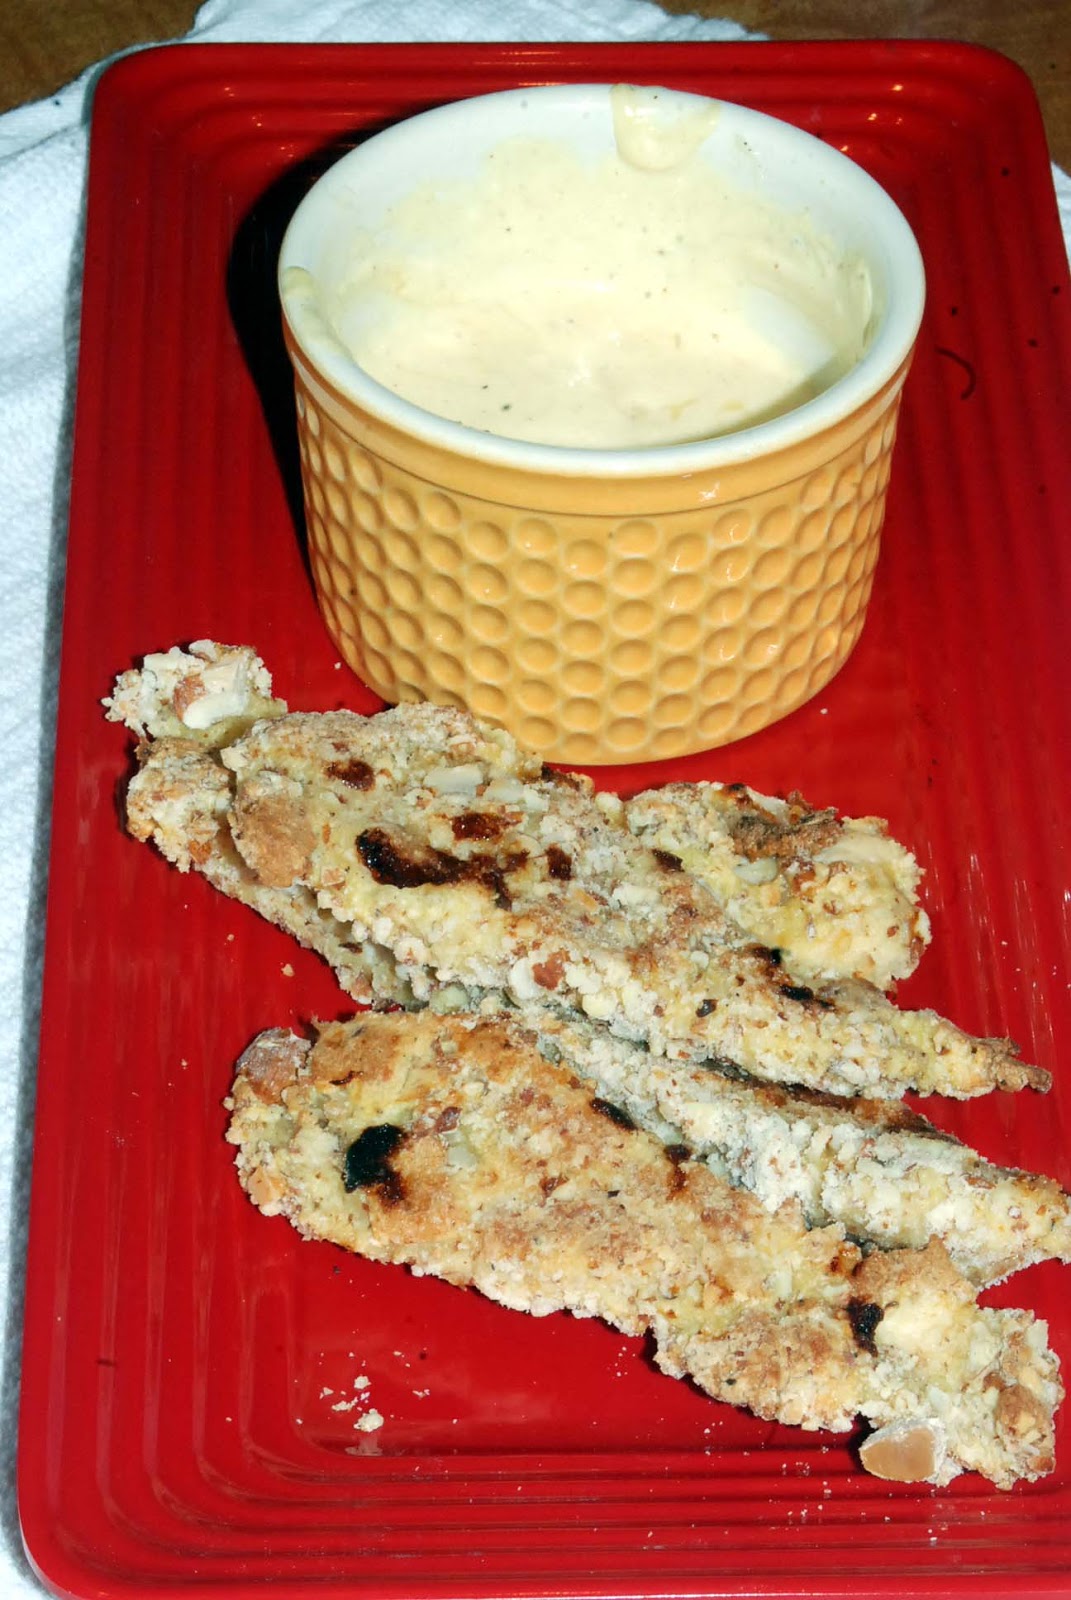
Almond Chicken Tenders

Like many families chicken tenders are a favorite in our house.  You can dress them up, chop them up or eat them plain.  They make an easy snack lunch or dinner and are always a hit with the kids.

Every few weeks I try to make a large batch to keep in the freezer.  I am not very consistent about making them and having them available, but when I do it is always a wonderful treat to open the freezer and find them there.  Especially when I haven't thought about dinner, it's 6:30 and everybody is starving and grumpy.  

I usually use the same basic recipe for the coating - bread crumbs and a mix of Italian seasoning.  Tasty, but nothing fancy and to be honest I get a little tired of having the same old things in the freezer all the time.   When those ho hums set in I often look for some inspiration to change things up and for me inspiration for change often comes from the Secret Recipe Club.  This month my inspiration came from Melissa at a Fit and Spicy Life.  Her blog is filled with a wonderful assortment of recipes, fitness tips and wine - the perfect trifecta.

Melissa's recipe for Almond Chicken Fingers is a delicious change from our typical tenders and will definitely be a regular item in the freezer.   They are moist, flavorful and work in a variety of dishes - they were delicious in an Asian chicken salad and just as tasty with a little honey mustard dipping sauce


 I made one change to Melissa's recipe, only because of what was available in my pantry.  I didn't have enough whole almonds, so I roughly chopped what I had and then used some almond meal flour to finish the coating mixture. The chopped almonds provided a wonderful texture while the almond meal gave the tenders a nice thick coating.

The other change I made was in process, I like using coating trays - mainly because my kids love to help, getting thick messy fingers is very entertaining for them - but you can also use the dip and shake method as Melissa does, it's all preference.  


Almond Chicken Tenders

2 lbs chicken breasts, cut into tenders
1 cup unsweetened almond milk
2 eggs
1 Tbsp Dijon mustard
1/4 cup almonds, finely chopped
1 1/2 cups almond meal flour
Salt and Pepper

Preheat oven to 400.  Lightly oil (or spray) a cooking sheet.
In a small bowl beat eggs, almond milk and mustard together, set aside.  In a large bowl combine chopped almonds, almond meal, salt and pepper.  Dip a chicken tender first into egg/milk mixture then into the dry mixture.  Place coated tender on baking sheet, repeat with remain tender.  Place tenders in a single layer with space between each piece. 
Bake 20-25 minutes, depending on thickness of chicken.  Using tongs flip chicken pieces half way through baking time.

And if you are in need of a little change and inspiration check out the rest of the SRC

Friday, April 5, 2013

Scrambled Eggs w/ an Egg-celent Giveaway

I live in a pretty social neighborhood, it seems as if someone is always hosting a fire-pit, wine party or some type of get together.  These everyday type of gatherings are always fun and we all enjoy them, but what the neighborhood really enjoys is a big all out party.  These are usually family friendly celebrations, that have grown in size year to year.  Our biggest is Halloween, but Easter is making a good run for it and may possibly take over


After a couple of months of hibernation everybody is ready to get out again and catch up with neighbors and what better way to do that than with a huge brunch and lots of drinks.  Like all good celebrations there is a major focus on food.  We have the traditional egg hunt and games for the kids but really, it is the food that brings us all together.


I usually bring a coffee cake or some type of baked good, but this year, with some help from Eggland's Best - and these wonderful goodies


I decided to bring an egg dish.  While I love my buttery, sugary coffee cakes I wanted to provide something with a little more nutritional value and since not all eggs are created equal I turned to EB

Did you know that compared to ordinary eggs, Eggland’s Best eggs contain:
·         10 times more vitamin E
·         Double the amount of omega-3’s
·         Twice the amount of vitamin D
·         3 times more vitamin B12
·         25% less saturated fat
·         38% more lutein 

 I wanted to make something that would be quick and easy to make and easy to eat while standing around chatting.  I checked out EB's great recipes and I was very tempted by their Breakfast burrito, but I make a messy burrito and become a mess eating them.  The breakfast sandwich also sounded yummy, but the idea of cooking all those fried eggs was less than appealing.  The solution scrambled egg sandwich.


Not very fancy, but super yummy.

Since I was making a large batch I sped the process up a bit by using a blender.  This also makes the scrambled eggs very light and fluffy by infusing a lot of air into the mixture, and air is the key ingredient to a good scrambled egg.


After a whirl in the blender, they went in the pan for a quick scramble with some diced ham and shredded pepper jack cheese.   I under-cooked the eggs slightly so that I could keep them warm in the oven without worrying about them drying out.  These can be made with any size roll, but I opted for a small sandwich roll, lightly toasted, with the center hollowed out.  A little sprinkle of cheese on top and they were ready to go.

Eggland's Best was kind enough to send me a wonderful Best Brunch Prize Package and they have another waiting for one of my readers.  If you would like to win an Eggland prize package leave a comment telling me what EB recipe you would like to try.  Winner will be picked on April 12th.

The winner will recieve:
  •   (1) coupon for one free dozen Eggland's Best eggs
  •   (1) ceramic mixing bowl
  •   (1) egg-shaped wooden cutting board
  •   (1) whisk
  •   (1) bowl scraper
  •   (1) ceramic mug
  •   (1) eco bag
Check out Eggland's Best on these other social media sights.  

Light and Fluffy Scrambled Egg Sandwich

5 eggs
5 Tbsp. Milk
1/4 cup grated pepper jack cheese
1/4 cup diced ham
Salt and pepper
2 small Hoagie rolls, with center removed, lightly toasted

Over medium heat melt 1 tablespoon butter in large non-stick saute pan.  Crack eggs into the container of a blender, add milk and a pinch of salt and pepper.  Blend on medium speed until mixture is uniform in color and frothy, about 20 seconds.  Pour into preheated saute pan. Sprinkle cheese and ham over eggs and gently stir with a rubber spatula. Once eggs are no longer liquid remove from heat, they should still look wet. 

Fill toasted rolls with egg mixture.  Sprinkle with additional cheese, place in preheated oven for 3-5 minutes or until cheese melts


Thank you to EB for the great giveaway and good luck to one of my readers!


*The Eggland's Best coupon, information, and two gift packs have been provided by Eggland's Best.”  Recipe and opinions are all mine.