Thursday, September 29, 2011

Birthday Cake

I had a last minute request for a birthday cake.  There was no design request, which is one of those things that I love and hate.  It is nice not having to live up to any preconceived idea of what the cake will look like, but it is a little stressful having to come up with something that will appeal to the recipient without any guidelines.  This is the final product


Very simple, but it gave me the opportunity to practice some basic cake making skills, like getting the icing smooth which I still struggle with.


Also in the works is a Strawberry Shortcake birthday cake for my daughter who is turning 5.  I tried to convince her to go with an owl cake.  I have been thinking about an owl cake since July when Louise posted this cake from her sons's birthday party, plus I have been seeing so many cute owl projects that I want to make, but she is standing her ground and Strawberry Shortcake it is.  Which I am happy about since I loved the Strawberry Shortcake gang as a kid and it is nice to see they are still around.

On a side note has anybody tried any of the new products from Wilton?  When I went to Michael's to pick up some supplies I was amazed by all the products.  Sheets of fondant/gumpaste, tons of different cutters and molds.  Has anybody found anything that is really great?

Saturday, September 24, 2011

Cookies or Cake

This month was the last month the Cake Slice bakers were baking with Lauren Chattman's book "Cake Keeper Cakes."  We didn't vote on a cake this month as in previous months, instead we could choose any cake in the book.  There were a couple of cakes I had been eyeing and looking forward to making,  unfortunately I didn't get around to making one of her cakes.

My husband's birthday was earlier this week.  Mike isn't a cake guy, he is a cookie, pie, tart kind of guy, so this year I told him I wasn't making a cake.  He could choose anything else, but I wasn't doing a cake.  He chose Oatmeal Raisin Cookies and I was all set to make them.  But then I turned on him, the idea of not having a cake for his birthday just didn't seem right.  I think everyone should have a cake on their birthday, so he got an Oatmeal Raisin Cake for his birthday.

When thinking of this type of cake it didn't sound right to me.  I don't know why, but it sounded like it would have an odd mouth feel. I was completely wrong and this was a delicious cake.  My son kept on insisting it was a carrot cake, as the flavors are very similar.  I topped the cake with a browned butter icing which was a nice accompaniment.  This is a great cake for the fall and  is also great for a birthday celebration that you don't need a cake for, but want to make one anyway.

Oatmeal Raisin Cake
Printer Ready

1 cup Old-Fashioned Rolled Oats
1 cup Golden Raisins
1 ½  cups boiling Water
2 Tbs. Rum
1 ½  cups sifted Flour
1 tsp. Baking soda
1 tsp. Cinnamon
½  tsp. Nutmeg
¼  tsp. Cloves
½ cup Butter
1 cup Sugar
½ cup Brown Sugar
2 large Eggs
1 tsp. Vanilla

Preheat oven to 375°F.  Butter and flour an 8x12 inch baking pan.
Combine oats and raisins, add boiling water and stir until combined.  Allow to cool to room temperature.  

Sift the flour with the baking soda and spices, set aside.  In large mixing bowl cream together butter and sugar until light and fluffy.  Add eggs and vanilla; beat until until well mixed.
Add sifted flour mixture alternating with the cooled oatmeal, starting and ending with the dry ingredients.  Mix until combined.
Pour into prepared pan.  
Bake for 35-40 minutes, or until a cake tester inserted in center of cake comes out clean.

Cool completely and top with Brown Butter Icing.  


Brown Butter Icing
Printer Ready

4 tablespoons Unsalted butter
2 tablespoons Cream Cheese
1 ½  cup sifted confectioner's sugar
1 teaspoon pure vanilla extract
1 to 2 tablespoons milk

In a small saucepan, melt butter over medium-high heat until nut-brown in color, about 10 minutes. Remove pan from heat, and pour butter into a bowl of electric mixer, leaving any burned sediment behind.   Add ½ cup sugar and mix until combined.  Add cream cheese and mix until smooth.  Continue adding sugar mixing until smooth.  Add vanilla and 1 tablespoon milk.  Add remaining tablespoon a little at a time until consistency is spreadable.  

Tuesday, September 20, 2011

Buffalo Chicken Wings

I love buffalo chicken wings.  Messy spicy sauce with cool blue cheese dressing - yumm!  I remember my Dad making them for parties when they were a new fad food.  In college my roommates and I started many evenings out at a local bar that served the best wings, we would often finish the night here as well.  I am constantly searching for a place that comes close to The Monopole, but I still haven't found it.

Despite my love for wings I have never tried to make them. Last weekend I decided to finally give it a try, maybe I could make wings that could compare to what I remembered from college.  The result - a total flop.  Now I am just craving wings even more.  The sauce never stuck and the result was a boring wing with no flavor.  We still managed to eat them all, but that was because of the blue cheese dressing which was very yummy.

I am so sad about this flop, it had the makings of a perfect Fall afternoon feast.


I think wings are best when fried, but I know they can also be good when just baked.  So what happened?  Here is the recipe I used.  I forget exactly where I found it, but it is comparable to many others I looked at.  Any suggestions on why these were such a flop?  Anybody have a good no fail recipe to share?


Buffalo Chicken Wings

3 lbs Chicken Wings
1/2 c. Butter, melted
1/2 c. Franks Red Hot Sauce
2 1/2 tsp. Tabasco Sauce
1 1/2 Tbs. Chili Powder


Place wings in single layer on baking sheet.  In 375 degree oven bake until wings are cooked through and slightly crispy.

While wings are cooking combine remaining ingredients in large bowl.  Add cooked wings and toss to coat thoroughly.  Return coated wings to baking sheet.  Lower oven temperature to 300 and bake wings for an additional 10 to 15 minutes.

Blue Cheese Dressing

2 oz. Blue Cheese, crumbled
1/4 c. Buttermilk
1/4 c. Sour Cream
1/4. c. Mayonnaise
Juice of 1/4 lemon
Salt and Pepper to taste

In small bowl combine all ingredients.


Monday, September 12, 2011

September SRC - Brownies

It is Secret Recipe Club time again and this month I had the privilege of meeting Jenn over at  The Misadventures of Mrs. B.  I got sucked into Jenn's blog and ended up spending a lot of time over there.  She has great recipes as well as wonderful reflective "self:" articles.  I really enjoyed getting to know her.

As I said there were a lot of great recipes to choose from and I had a really difficult time deciding which one to try.  I was tempted by her Buffalo Chicken Dip, but I had just made chicken wings, so I decided to bookmark that for a later date.  After more contemplation I decided on Indian Butter Chicken, I was looking forward to making a wonderful Indian feast and then Jenn had to go and post this recipe and the chicken went out the door.  The chicken is on this week's menu, but the brownies became a priority.

There were a couple of reasons why I had to make these brownies.  Jenn's description of them being "decadent, super chocolate, sexy, rich, fudgy brownies" was pretty persuasive, but what really clinched it for me was the fact that she found the recipe on Pintrest and I have to agree with her that that site is evil.

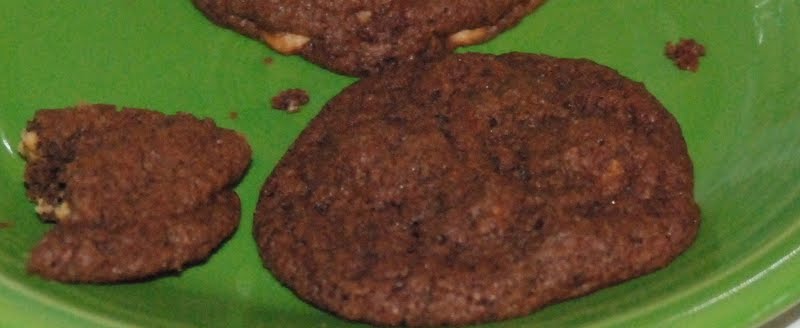
Reading the recipe I knew this brownies would be all she described them to be, but decided to up them a little more by adding chopped Reeses Peanut Butter Cups and Chocolate chips -  oh my decadent to the extreme.  With or without the extras this is a great recipe and it was wonderful to find it on such a great blog.

The “Baked” Brownie (Printer Ready)
from The Misadventures of Mrs. B

Ingredients:
1¼ c. All-purpose flour
1 tsp.  Salt
2 tbsp. Unsweetened cocoa powder
11 ounces Dark chocolate, coarsely chopped
1 c. (8 ounces) Unsalted butter, cut into 1-inch pieces
1 tsp Instant coffee
1½ c.  Granulated sugar
½ c.  Light brown sugar, packed
5 Eggs, at room temperature
2 tsp Vanilla extract

Directions:
Preheat oven to 350 degrees.  Coat a 9×13 pan with cooking spray, line with parchment paper or foil.  

In a medium bowl, whisk together the flour, cocoa powder and salt.  Set aside.

In a double boiler, or large bowl set over a pot of simmering water, melt the chocolate, butter and coffee together.  Whisk until smooth.  Turn heat off and add sugars.  Stir to combine.

Remove bowl from on top of pot.  Mixture should be at room temperature.  In separate bowl lightly beat eggs and vanilla.  Add to chocolate mixture, mix until just combine.  Do not over-beat, over mixing will cause the brownies to become more cakes and less fudgy.  

Sprinkle flour mixture on top of chocolate and gently fold in until just a little bit of flour is visible.  

Pour batter into prepared pan and place in oven.  Bake for 30-40 minute.  Brownies are finished when a toothpick inserted into the center is clean, with just a few crumbs clinging.  Use parchment/foil to lift brownies from pan.  Cool and cut into squares.


*As I mentioned I added peanut butter cups and chocolate chips to the recipe, I didn't add these items to the recipe listed above since I just added what remains I found in the pantry. It is one of my favorite ways to use up little bits of candy.


Thursday, September 8, 2011

An Apple a Day


I was so proud I had the back to school snacks all set, but once I saw these on Pintrest I knew the cookies would have to wait.  I made two batches of these silly treats, one for our neighborhood back to school party and one for us, and both were devoured very quickly.


I love Rice Krispie treats, they are a childhood comfort food.  I was a little apprehensive about adding Jell-o to them, why mess with a good thing, but was pleasantly surprised with the results.  I still prefer plain Rice Krispie treats, but my kids think the flavored are better, I guess you just can't go wrong with marshmallows and krispies.

I used Tootsie rolls for the stems and leaves.  I am a huge fan of Tootsie Rolls and it was one time I was actually glad that Halloween candy was out at the beginning of September.  I usually spend two months resisting this bag of goodies and was happy to have a good excuse to buy this huge bag of candy.  I will now spend the next two months trying not to eat the entire bag.


Rice Krispie Apples
Print Ready


4 Tbs. Butter
10 oz. Marshmallows
1 pkg.  Strawberry Jell-O
6 c. Rice Krispie Cereal

Miniature Tootsie Rolls
Lime flavored Tootise Rolls (Green icing, Fruit Roll-up or other “shape-able” candy will also work)

Directions:

In large pot, over medium heat melt butter.  Add marshmallows and stir continuously until melted.  Remove from add Jell-O, stir until completely mixed in.  Add cereal and mix until thoroughly coated.  

With buttered hands shape about a ¼ c. of cereal into a ball.  Once all cereal is shaped use your thumb to make a slight impression in top of ball.  Add Tootsie Roll stem and leaf.


Sunday, September 4, 2011

Back to School

School starts on Tuesday and we are all set.  School supplies have been purchased and put in the backpack, first day of school outfit has been chosen and most importantly the after school snack is all set.


I have been hungry for Chocolate Peanut Butter Chip cookies for about two weeks.  So, while everyone was out of the house I took the opportunity to do some baking all by myself - it has been awhile since I have done any cooking without my helpers and it was a very nice treat.  This is a back of the bag recipe and it is just wonderful.  It is one of my favorite recipes and a cookie I never tire of.  It is a large recipe and I certainly don't need 4 dozen cookies around the house, so I baked off two dozen - sending a dozen down the street to the kids and Dads who were splitting wood  from trees that fell during Irene.  The remaining two dozen I froze.


I love having frozen cookies in the freezer.  There is nothing better than being able to bake off one or two cookies without having to deal with the prep and cleanup.  Having an assortment of flavors is especially nice, just set aside a half dozen or dozen each time you make cookies and everybody can have their favorite, a freshly baked cookie for all!


Chocolate Peanut Butter Chip (Printer Ready ) From Hershey's
2 c. All-purpose Flour
¾ c. Hershey’s Cocoa Powder
1 tsp. Baking Soda
½ tsp. Salt
1 ¼ (2 ½ sticks)  Butter, softened
2 c. Sugar
2 Eggs
2 tsp. Vanilla extract
1 ⅔ c. (10 oz.) Reese’s Peanut Butter Chips

Directions:
Preheat oven to 350.  Line cookie sheets with parchment paper.
Sift together flour, cocoa powder, baking soda and salt.  Set aside
In large mixing bowl cream butter and sugar until pale in color and fluffy.  Add eggs one at a time, mixing until combined.  Add vanilla extract.  Slowly add flour mixture.  When mixture is almost combined add peanut butter chips,  gently mix until chips are evenly distributed.  
Using a cookie scooper, scoop cookies onto tray, spaceing cookies about 1” apart.  Bake 8-10 minutes.  

*If freezing, scoop cookies as directed.  Place onto parchment lined cookie sheet, cookies can be placed closely together.  Place in freezer until frozen then transfer to zip-lock bag.  


Friday, September 2, 2011

Gnocchi

After being away for a week camping and visiting family, then coming back to an earthquake - which is very unusual around here - and finally losing power for two days because of hurricane Irene, I feel like I am just reentering the modern age.   All of these things on top of getting the kids ready to go back to school has made these last two weeks a blur.
To help ease back into a routine and begin posting again I decided to start with something easy - Gnocchi.  I saw this recipe in July's Secret Recipe Club reveal and knew it would be a perfect recipe to do with the kids.  It is a simple recipe and perfect for all ages and ability levels, plus it is a great recipe to have on hand when you need a quick dinner.


Older/Experienced Cooks Can:
  • Prepare mise en place
  • Measure ingredients
  • Mix
  • Roll and cut dough
Younger/Beginner Cooks Can:
  • Assist with measuring
  • Mix ingredients
  • Roll and cut dough
Hints and Suggestions:
  • Challenge older cooks to use only one measuring cup - great practice with fractions.  
  • Have younger cooks use a ruler when cutting - provides regular size pieces and gives practice with number recognition.  
Gnocchi in general is pretty easy, but this recipe is great because it is made with instant mashed potatoes so you can make it last minute and not have to worry about the extra time of cooking and mashing potatoes.  Pair it with a simple salad and top with your favorite sauce and it makes a wonderful quick dinner.


Gnocchi

1 c. Instant Mashed Potates flakes
1 c. Boiling Water
1 Egg
1 ½ c. Flour
½ tsp. Dried Basil
¼ tsp. Garlic Powder
Salt and Pepper to taste

In mixing bowl combine potatoe flakes and boiling water, mix until combined.  Stir in egg.  Add remaining ingredients mix until combined.  
On lightly floured surface knead mixture until soft, about 10-15 times.  Divide dough into four even balls.  Working with one ball at a time roll dough into a long rope about 1/2” thick, then cut into about 1” pieces.  Using a fork lightly press each piece.  Repeat process with remaining balls.  

To cook, place small batches of gnocchi in large pot of lightly salted boiling water.  Cook until pieces float, about 1 minute, remove with slotted spoon.  

Top with your favorite sauce and cheese, and serve!