Showing posts with label cooking with kids. Show all posts

Sunday, July 7, 2013

Turkey Potato Galette

I have been participating in Secret Recipe Club since June 2011.  Between the blogs I have been assigned and those I visit on reveal day I have checked out a lot of blogs, yet there are always new ones to discover.  And that was the case with this month's assignment.  I am not sure how I haven't come across Camilla's blog before, but I will definitely be going back there on a regular basis.

Just as the name implies, Culinary Adventures with Camilla is filled with great recipes and great adventures.  Food isn't just enjoyed at home, but experienced in many places and ways.  She talks about picking cherries and olallieberries (a fruit I'm not familiar with) with her kids,  food is incorporated into movies and she has a great collection Cooking Around the World recipes.  But what I love most is that she is passing her love of cooking and food on to her kids.  I love her goal to "grow conscientious, creative kids with fearless palates." and would say it seems she is definitely achieving it.

When it came time to actually making something I had trouble narrowing it down, so I combined a couple of different recipes.  My first choice was the Herb Potato Onion Galette.  It had been a long time since I  made a Galette.  It is one of those foods that I forget about and then become obsessed with,  I love dishes that can be either sweet or savory and can easily substitute or swap ingredients, plus I had a lot of potatoes that needed to be used.  I also wanted to try Camilla's Kale Garlic Turkey Meatballs, again I had some kale that needed to be used up. So, instead of deciding between the two I made both, resulting in a delicious Turkey Potato Galette.


When I made this the first time, I cooked everything separately, but found that to time consuming.  I made a second batch this time cooking the potatoes and onions together and cooking the turkey and kale together.  Not only is this faster, but it also helps bring all the flavors together.


Turkey Potato Galette (Printer Ready)

Ingredients:
5-6 yellow potatoes, thinly sliced
1 large sweet onion, thinly sliced
½ lb. ground Turkey
1 bunch kale, washed and roughly chopped
¼ teaspoon cumin
¼ teaspoon paprika
3-4 cloves roasted garlic
1 disc pate brisse


Directions:
Preheat oven to 375.  Place potatoes and onion in a single layer on large baking sheet.  Drizzle with olive oil and lightly sprinkle with salt and pepper.  Bake for 10-15 minutes or until the potatoes are just tender to the touch.  Remove from oven and set aside.


Place saute pan over medium high heat, add a tablespoon of olive oil.  Once pan and oil are warm add turkey, cumin and paprika.  Cook until turkey becomes light brown, add kale and continue cooking until kale is wilted.  Remove from heat.


On a piece of parchment paper roll brisse dough into a large circle. Move parchment paper and dough onto a baking sheet, it is ok of the dough hangs over the sides of the baking sheet.  Smash roasted garlic into a paste, rub onto dough.  Place turkey, kale, potatoes and onions in center of the dough, leaving about 2 inches of dough to fold over.  Fold dough over leaving some of the filling exposed.  Bake for 30-40 minutes or until lightly golden.


Savory Pate Brisee (Printer Ready)
(modified from a Roland Messier recipe)


Ingredients:
1 teaspoon salt
½ cup water
3 cups all-purpose flour
½ teaspoon garlic powder
2 teaspoon dried basil
1 teaspoon dried parsley
1 cup unsalted butter, chilled and cut into small pieces
1 egg
3 egg yolks


Directions:
In the bowl of an electric mixer combine salt and 1 tablespoon of the water, stir to dissolve the salt.  Add the flour, garlic, basil, parsley and butter.  Using the paddle attachment mix on low speed until the mixture feels like sand.  With the mixer still on low add the egg and yolks one at a time.  Add remaining water, mix until the dough just comes together.  

Turn the dough out onto a lightly floured surface, divide into 2 equal size pieces.  Shape each into a ball and then pat into a disc.  Wrap them tightly in plastic wrap.  Refrigerate for at least one hour before using.  Can be kept in refrigerator for up to 3 days or in freezer, wrapped in plastic wrap and aluminum foil, for up to 2 months.  


Tuesday, September 18, 2012

Bacon Day

Tuesdays have recently become "bacon day" in our house. We don't sit around eating bacon all day as tasty at that might be.  What we do do, is bake a special treat.  Tuesdays are our quiet unplanned days, it is also the day that my youngest tells me she never gets to do anything fun and it isn't fair that she doesn't get to go to school everyday like her brother and sister.  To help make her feel better I told her that we would make Tuesdays our special baking day - or "bacon day" if you are 3 and have trouble making "-ing" sounds.

This week we went for a classic, everyone's favorite M&M cookies. 

Like most 3 year old kids scooping and dumping is tons of fun for Edy, so she was in charge of scooping the ingredients into the measuring cups, then pouring into the mixing bowl.  Edy's other main job was the placement of M&Ms.  She alternated between over loading the cookies to only putting one candy on, for fear there wouldn't be enough candies leftover for her to eat when we were done.   


As always, kids learn a ton just being in the kitchen, but if you are looking to get a little extra teaching in while baking, M&Ms are a wonderful teaching tool.  Some fun ways to use them are:
  • Have the kids place the candies in a pattern
  • Ask them to put 3 red, 2 green and 2 yellow then have them tell you how many candies are on the cookie
  • Tell the kids each cookie needs 10 candies and they can only use 3 colors.  How many of each color is used?
 M&M Cookies (Printer Ready)

1 1/2 teaspoons pure vanilla extract
2 cups all purpose flour
1 1/4 teaspoons baking soda
1/4 teaspoon salt
1 cup unsalted butter, room temperature
1/2 cup  granulated white sugar
1/2 cup firmly packed light brown sugar
1 large egg
1 egg yolk
1 cup M&M's

Preheat oven to 350°
In large bowl whisk together flour, baking soda and salt, set aside. In large mixing bowl combine butter and sugar, mix until light and fluffy.  Add eggs and vanilla, beat until just incorporated.  Add flour mixture, again mixing until just incorporated.  

Using a medium sized cookie scoop place balls about 2 inches apart on ungreased parchment lined baking sheet.  Place M&Ms on top of cookie.  Bake for 8-10 or until light golden brown.

*Note M&M’s can be added to the batter after the flour has been mixed in, but I like to put the candies directly on the dough to ensure they stay at the top of the cookie.    


I hope to continue Tuesday Baking Day. It is a nice way to spend some extra special time with my baby Whatever day is your "bacon day" enjoy it with someone special. 


Saturday, July 14, 2012

Cherry Ice Cream

We are big fans of our cherry chomper.


He is cute and easy to use - the kids love him. He is often in demand by a couple of people at once, which of course results in fighting - my kids are professional petty squabblers.  When OXO offered to send me one of their cherry pitters I jumped at the chance. Not only because it looks super easy to use, but I  thought adding another pitter to the collection would eliminate at least once source of household fighting.


When the pitter arrived OXO was very generous and also sent along an ice cream scoop.  I saw the two items together knew immediately what to make - Cherry Chocolate ice cream.


I only had one helper around, so the two of us got to work pitting the cherries.  Maggie wanted to try the new pitter, it was a little big for her hands so kept switching between the two.

 I found it super easy to use and we went through the two pounds of cherries very quickly.


I used about two cups of cherries for the ice cream. Half a cup was chopped up and thrown into the freezer. the remaining cup and a half was added to some cream, cooked until soft,


then pureed into a beautiful pink cream.  The cream was chilled for a bit and then put into the ice cream machine.  


Just as it was finished mixing the remaining half cup of chopped and frozen cherries was added to the ice cream, along with chunks of chocolate. The result was a wonderfully creamy chunky ice cream perfect for a hot summer day.  


Cherry Chocolate Ice Cream


1 cup heavy cream
1 cup milk
1 cup sugar
2 cups sweet cherries, pitted
1/2 cup roughly chopped, bittersweet chocolate

In saucepan combine heavy cream, sugar and 1 1/2 cups cherries.  Over medium high heat bring to a boil, reduce heat to low and simmer for 15-20 minutes or until cherries are soft.  Let mixture cool slightly, pour into blender and puree.  Pour into bowl and refrigerate for at least 2 hours, can be left overnight.

While mixture is cooling roughly chop remaining 1/2 cup of cherries, place in freezer along with chocolate chunks.  Once mixture has cooled place into ice machine, mix following manufactures instructions.  Just before ice cream is done mixing add frozen cherries and chocolate.  Mix until combined.  


In case you were wondering it doesn't appear as if adding another pitter will eliminate any fights, it just adds to the things to fight over. Now they fight over who uses which pitter.

Sunday, June 24, 2012

Happy Trifle

Yesterday Maggie was having one of those sad, lonely, frustrating type days.  She wanted, needed, something she could do by herself - all by herself.  After going through the pantry, fridge and the freezer we came up with the ingredients for trifle.


This is a wonderful dish for kids to make.  It is super easy to make and a great confidence booster.  They can choose the components and make a dish that is uniquely their own.  Providing some guidance in flavor selection is helpful, but if you provide a couple of options to choose between you can have a dish that is yummy, but they still having the feeling it was their creation.  


Maggie decided to make a chocolate cherry trifle.  She used some white chocolate cake, yellow cake, chocolate pudding and cherries - she chose the cherries because she likes using the cherry chomper.  


I usually have cake scraps in my freezer, but if you don't you can easily run to the store and pick-up a pound cake.  


I also make sure I always have instant pudding on hand.  My kids like pudding, but they like making it even more, again because they can do it all on their own.


It took Maggie about half an hour to cut the cake - cake is a great way for kids to practice those knife skills, make the pudding - using those reading skills and chomp the cherries - great for getting out built up frustration.


Squirting canned whipped cream and adding lots of sprinkles brings on extra smiles.  


In the end we had a yummy dessert and a happy 5 year old.  


Monday, May 21, 2012

Meringue Cups

It is Cake Slice time and I am happy to say that I actually got this month's recipe done on time.  Well, almost on time, I made it on the reveal date, but am getting it up a day late.  And since I am being honest I didn't really make the dessert, Maggie did.

This month the winning recipe was Tish Boyle's Meringue Cups with Lime Cream and berries.  This is one of those desserts that looks very impressive, but is super easy to make.  Another plus is that it can be made ahead of time and then assembled quickly at dessert time.


I also love this dessert because it is great to make with kids.  I worked with Maggie and she made the meringue and cut the berries pretty much by herself, while I did the lime curd.  Separating eggs is a great task for kids.  It is an opportunity to play with food that is oohy and gross.  Just remember to use 3 bowls when separating so if a yolk breaks it does not ruin your whites.


I like to use the hand mixer when making small batches of meringue.  It is much easier to watch the whites transform from a thick gelatinous liquid to soft billowy peaks when using a hand mixer.  I would also recommend that if you haven't done it in a while to take the time to whisk up egg whites the old fashioned way - by hand with a metal whisk in a copper bowl.  It is a really neat experience to feel the transformation of the white.


Meringue is also great for practicing piping skills.  It is easy for small hands to squeeze out and I think the cups look even better in funky shapes, it gives more surface for the cream and berries to cling to.


The curd can be a little trickier for kids, but it isn't that difficult if you are willing to stand at the stove and stir while it cooks and thickens.  Let the curd cool, then just before serving lighten it with a little whipped cream.

As I said this is a great dessert for your repertoire.  It is wonderful any time of year topped with whatever fresh or frozen fruit you have available.  But the thing I love best about it is the joy on the chef's face when it is presented.


Sunday, May 6, 2012

Beach Party

The kids' preschool just had its annual Fun Fair and one of the most popular events is the cake walk.


It has become a tradition for each of the classes to make a cake to donate and this year I worked with the youngest class.  The theme of the fair was "beach party" and after a lot of thought I decided to go with a simple beach ball cake.  I wasn't sure if the final result would have any resemblance to a beach ball, but it turned out surprisingly well.


Baking with kids is always an adventure, working with 12 kids who are 3 years old it is an even greater adventure.  I have been doing cakes with the preschool classes for a few years now and have figured a few things out along the way:

  • Less is definitely more:  for the first couple of years I tried to give the kids lots of choices and include them in many of the steps.  This became too overwhelming for everyone. I still want them to be a part of the process, so now I give them 3 colors to choose from and we mix one batch of icing together.  The same with piping tips, I show them 3 different tips and the styles each tip makes.  They then vote on one tip to use.  
  • Have Samples:  the kids are going to stick their fingers in the frosting.  It is much easier to be prepared for this than try and stop it.  By having a bowl of frosting they can stick their little fingers in there is a slightly less chance they will go for the cake - when you see them going for the cake, offer the bowl.  
  • Keep the demo short and give lots of hands on time:  I like to build the cake in front of the kids and have them guess what we are making.  Once the cake is built I take one or two kids at a time to help decorate while the other kids are playing or working on something else.
  •  Have fondant:  Not all of the kids want to try to piping and with the really little ones some aren't strong enough to squeeze the bag, so it is nice to have something they can easily do on their own. 
  • Have fun: sometimes the best cakes are the ones where the kids take over.  Let them squeeze frosting and spread it around, the cake might not be pretty to us, but to the kids it will be the best cake ever.  


Tuesday, February 14, 2012

Last Minute Valentine's

Valentine's Day is one of those days I have big plans for, but never actually execute them.  Last night at 8:00 I realized all I had were some red and white gumdrops, and the only reason I had those was because they called my name earlier in the week when I ran into the drugstore to pick-up a few odds and ends.   So, last night after the kids went to bed I rummaged through the kitchen and came up with some stale marshmallows, chocolate chips and decorating sugar.  Twenty minutes later the kids Valentine's were done and I was on the couch ready to veg out to The Voice.

The kids loved their treat and I was able to send three kids off to school all sugared up. And my Valentine's treat is the kids being returned non-sugary.   The girls' school has a no candy policy for Valentine's Day and Will's class is celebrating the 100th day of school instead of Valentine's Day - that is the best way the teachers can show their love.

Sunday, February 5, 2012

Potato Soup

It has been a while since I have gotten Will in the kitchen with me.  With school and extracurricular activities there isn't as much time available and when the choice is between cooking and Wii, Wii will always win.  He says cooking is his favorite thing to do and he wants to be a chef when he grows up, but it is still hard to get him in the kitchen.

To help get him and the girls, in the kitchen a little more often I have started having a sous chef of the week.  Each week one of the kids is the special assistant.  They get to help plan the menu and the two of us go shopping together.  Going to the grocery store may not sound very special, but when it is just the two of us and they get to choose a special item to cook with it is a lot more enjoyable than being dragged to the store with your siblings and a grumpy mom. The sous chef has to help prepare one meal and can make a fun treat.  By being the assistant every three weeks they get to help and have additional responsibilities, but it is not so much that they get bored or feel like it is a chore.

For our inaugural week, Will was the sous chef and not surprisingly he chose to make soup for his meal.  Since he first started in the kitchen with me my boy has loved making soups and salads.  He wasn't sure what kind of soup he wanted, so I suggested potato soup - mainly because I had potatoes that needed to be used up before a garden began growing in the pantry.


Soups are a great meal for beginner chefs and for kids who are a little more experienced and want to try to prepare a meal by himself.  They provide lots of practice chopping and are a great way to introduce a  variety of different ingredients.  Granted potato soup doesn't introduce a lot different ingredients, but it is great for working on those cutting skills.  And potatoes are good for kids who have had some practice cutting and are ready to move to a sharper knife and beyond super soft foods.  Will is very comfortable using a knife, but I still make sure I cut the item, making a flat surface before he begins cutting it up.

I also like soups because they are good for those little cooks who start off super interested, then become distracted, then become super interested.  Will got 2 potatoes diced then lost interest, but rejoined once the immersion blender came out, who can resist the immersion blender.  We did learn a valuable lesson - pulling the blender out, while on causes the soup to fly, which is cool to see, unless it lands on skin, then it burns, which isn't so cool.  So, if you do use the blender with kids remind them to be careful.


I had Will write his recipe when we were done and this will be added to our sous chef cookbook.  He thoughtfully didn't add bacon since his dad is allergic to pork, but potato soup really is much better with a little bacon fat.


Potato Soup

4 tablespoons butter
1 onion, finely chopped
1 carrot, finely chopped
1 rib celery, finely chopped
2 cloves garlic, finely chopped
1/4 cup all-purpose flour
Salt and freshly ground black pepper
3 cups chicken stock
1 cup whole milk
1 (12-ounce) bottle light-bodied beer
2 large russet potatoes, peeled and chopped
2 cups grated extra-sharp Cheddar (about 8 ounces)


In large pot melt butter.  Add onion, carrots, celery and garlic, saute until vegetables are soft.   Add flour to vegetables and cook for 2-3 minutes.  Add salt and pepper to taste.  Slowly whisk in chicken stock, then add milk and beer.  Add potatoes, bring liquids to a boil, once at a boil reduce heat and simmer until potatoes become soft.

Remove from heat.  Using an immersion blender puree until smooth.  Return to soup to stove, over low heat slowly stir in the cheese until melted. To serve top with sour cream, bacon, chives, additional grated cheese, or your favorite topping.


Sunday, January 29, 2012

Kids Cupcakes

The cookbook Flour is absolutely beautiful.  Joanne Chang has filled the book with mouthwatering recipes that make me want to plan a trip to Boston just so I can visit the bakery.  The book sits on my baking shelf with many recipes bookmarked. I have been so excited to make something that I have been waiting for just the right occasion.  Which means the the book has been sitting on the shelf for over six months, untouched, not a single recipe made.  Until this week when I decided that Tuesday was special enough - we had made it through Monday so we might as well celebrate, with some lovely chocolate cupcakes.

Joanne explains that one of the things she likes about this recipe is that everything is dumped together and the result is a wonderfully moist super chocolaty cake.  Sugar and butter and water are combined until the butter melts and the sugar dissolved.  This is then poured over chopped chocolate and cocoa powder, everything is stirred together until silky smooth.  Some milk and egg are added and then some flour to bring it all together.  Then comes the part I really liked and have never done before the batter is left to rest before baking.  This gives the batter time to absorb the liquid and thicken up.  This little rest period is also good for little ones who might be easily distracted and become more focused on making-up their own recipes than finishing the one they  had started.


My favorite thing about this recipe, besides it's amazing taste and textures is that it a great recipe to do with kids.  There are opportunities to practice cutting, and scooping plus there are a variety of measurements - great for practicing math skills.


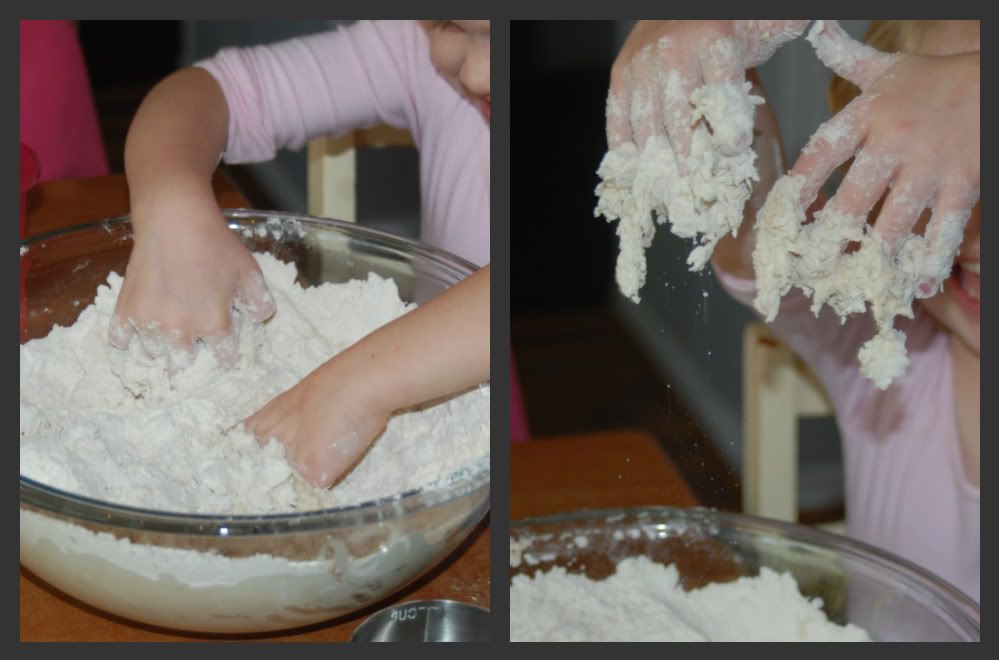
But the best part is it doesn't require the use of a mixer.  It is fun to use the mixer and it is great for kids to watch it go around and observe how the ingredients combine.  But, I think it is even better when they are the ones in control of mixing the ingredients together.  It is so much more fun to crack an egg, break the yolk open, slowly stir it around and watch it blend with the other ingredients until it has completely disappeared.  When doing it by hand beginner cooks get a much better sense of what the ingredients feel like and how they they work.  It can be a messy process, but there is nothing cooler than watching an egg drip slowly off the end of a spoon or play with sugar just as it is becoming moist.  Playing with sticky flour is also pretty cool.


Grab your favorite little person, a copy of Flour if you have it, or your favorite recipes and mix it together the "old fashioned" way.  When you're done go ahead and let them lick the bowl, having their name written on the forehead is optional.


Thursday, January 19, 2012

Pesto

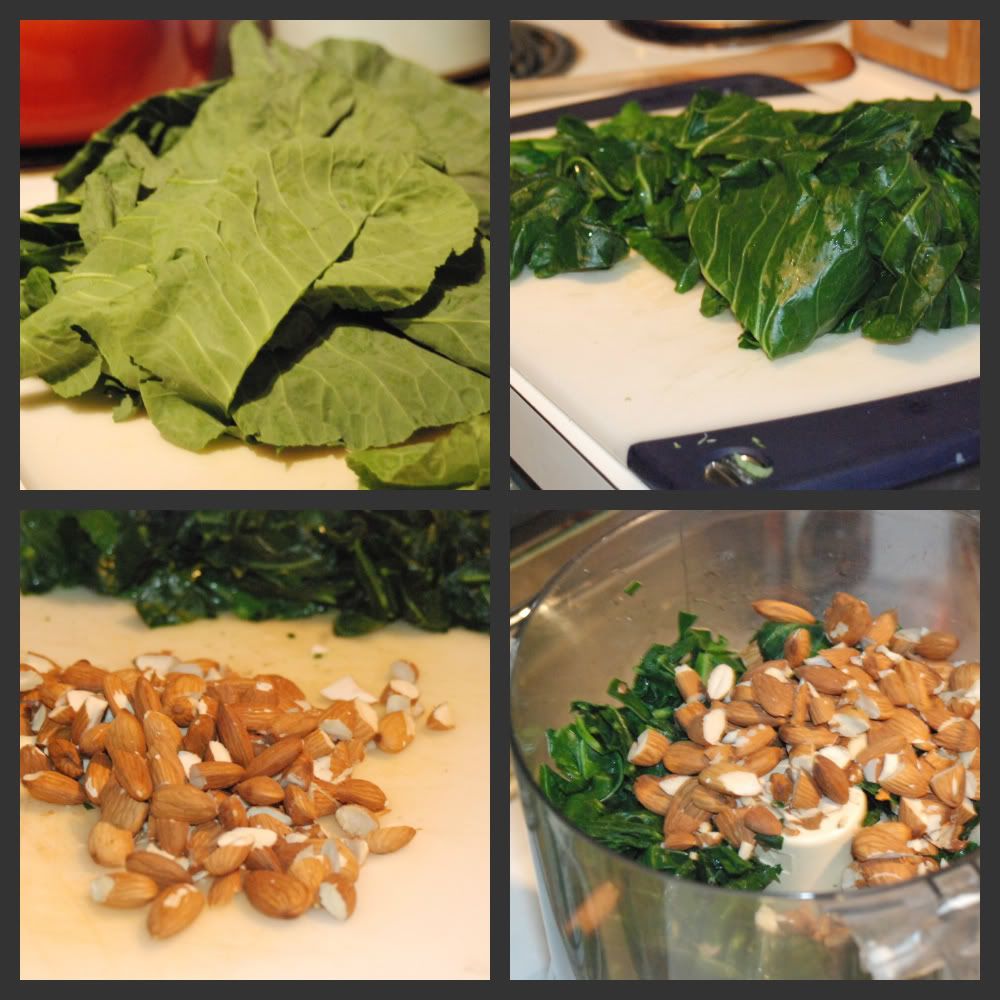
I am not a huge fan of cooking with greens.  I use them in soup, but other than that I don't know what to do with them and therefore end up not cooking with them very often.  Usually if I have some in the fridge chances are pretty good that a portion of them will end up in the garbage, and I thought that was the fate of the half bunch of Collard Greens I had leftover from our New Years Day celebration.  Then I saw Sunny Anderson making a collard green pesto and  I now have one more way of  using up those greens.

This is a wonderfully  garlicky and nutty pesto.  Without any bitterness that is sometimes found in greens.  The recipe by Sunny Anderson uses kalamata olives.  I didn't include them because I thought the brine flavor of the olives would be too much for the kids, but after reading reviews of similar recipes I am definitely going to add the olives next time I make this pesto.


Besides the wonderful flavor and numerous ways this pesto can be used, it is a a great recipe to make with kids.  There is something kids of all ages can do.  Older kids can do all of the steps, with the exception of cooking the greens.  Younger ones they can get lots of practice cutting by rough cutting the greens and garlic before adding them to the food processor.  And the really little ones always love pressing the buttons and watching the food go around in the food processor.


I got two meals out of this recipes.  I used it one night on pasta and another night used it as a sauce for turkey meatball subs.  Both dishes were simple, super flavorful and enjoyed by the big and little people of the house, which recently hasn't been happening very often.  


Collard Green Pesto
Printer Ready


1 lb Collard greens (stems removed)
½ cup Almonds lightly toasted
2 cloves Garlic
1 cup Parmesan cheese
1 cup Olive Oil

Directions:
Bring a large pot of salted water to a boil.  Add greens and blanch for about 1 minute, or until bright green.  Drain and shock in ice water bath.  Remove from ice water and pat dry with paper towels.  Roughly chop greens

Add greens, almonds, garlic and cheese to food processor.  Process until ingredients become finely chopped, with processor running begin adding olive oil until a paste is formed and pesto comes together.  


Tuesday, November 8, 2011

Everybody Soup

Why is it when I have nothing going on that I find myself scrambling to pull dinner together?

Yesterday the kids were out of school for a teacher work day.  I didn't schedule anything for us to do and left it up to them to decide.  Their decision, a jammie and TV day.  While they got bored with TV after a while, much to my surprise and happiness, they had no desire to get dressed.  They were all dressed by noon and we went outside to play for a while, but other than that we didn't leave the house.  We happily worked on other projects and had a lazy day.

One would think with all this down time I would make some bread and prepare a nice dinner, but no.  At 5:00 the kids started fighting, which signaled it was time to think about feeding the little animals.  Had I thought about dinner earlier I would have remembered I had not been to the grocery store in a week, so the pickings for dinner were a little thin.  And thin pickings mean one thing, soup.

I pulled a variety of ingredients out of the pantry, fridge and freezer and everybody got to choose one or two ingredients to add.   The result was a tasty soup that we named "Everybody Soup."   This time our soup included:  diced tomatoes, tomato puree, spinach, white beans, leftover pot roast, carrots, and corn.  Served with some corn bread it was a quick and wonderful meal to end our very lazy day.


What is your favorite last minute meal?  How do you get everybody involved to make the process go faster and  help calm the craziness?